Photomatix Pro: Create an HDR image

It seems like HDR or High Dynamic Range imagery is all the rage right now. There are lots of tools around for assembling an HDR image and, although Photoshop now has a tool to do this, PhotomatixPro is much more sophisticated and the results are much better, so I'll show you how to use it.
Before we start, however, a bit of background as to what HDR is and why you might use it. One of the limitations of digital cameras is that they can only capture an image with a fairly narrow dynamic range - the range of lights and darks in the image. In fact, faced with a scene that has very bright areas and very dark areas, you and I can see much more detail in the scene than the camera can capture in one shot.
However, the camera can capture lots of images of the same subject each with a different exposure. So you can expose for the light areas and again for the dark areas and again for the midtones and capture 3 of more images of the same subject that together show all the rich detail in the shadows and in the highlights. What HDR software does is to help you assemble these images into one image with a wider range of lights and darks than you can get in a single image.
To capture for HDR, ideally you need a series of images shot using a tripod so you eliminate movement between the images. Your overall camera settings should not change from one image to the next – except that the exposure for each will be different. Typically you'll use your camera's Auto Bracketing feature to capture the series and it's best to limit your shooting to a scene that won't change while you're capturing it so you don't get movement between frames.
It is possible to render an HDR image from a single camera raw image and you would have to do this if you were shooting a moving crowd for example. However it's best, where possible to capture multiple separate exposures. If you're using an IS camera disable this feature when shooting on a tripod - leaving it on can actually cause camera movement.
A trial version of Photomatix Pro 3 is available from www.hdrsoft.com so download and install it. If you don't have suitable images to work with, there are three sets of sample images on the site that you can use. Here's how to assemble an HDR image from multiple exposures: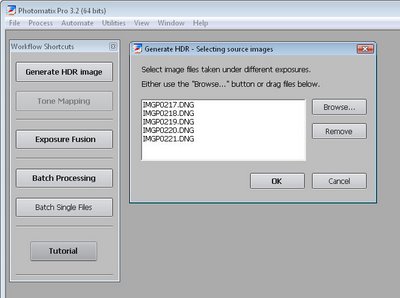
Step 1
Launch Photomatix Pro 3 and select Generate HDR image. Select your series of images and click ok. You can use three or more images and the program can read DNG files so you don't have to convert these first.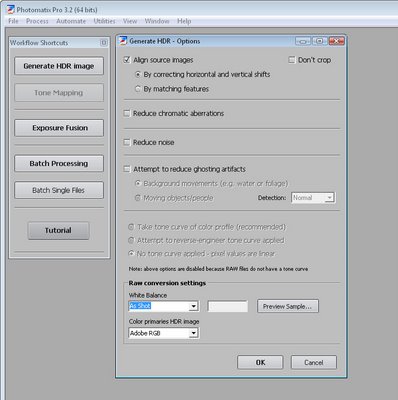
Step 2
In the dialog you can select to Align the images if you think there may be some movement and you can change the White Balance setting. You can also select to reduce ghosting artifacts which may occur if there is movement between images such as people walking.
Click Ok and wait as the processing is performed. 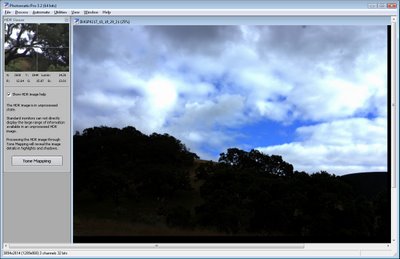
Step 3
The resulting image won't look good and that's to be expected. You can save it at this point if desired by choosing File > Save As and save it as a .hdr image. You can later open this and work on it without having to generate the HDR version from the source images again.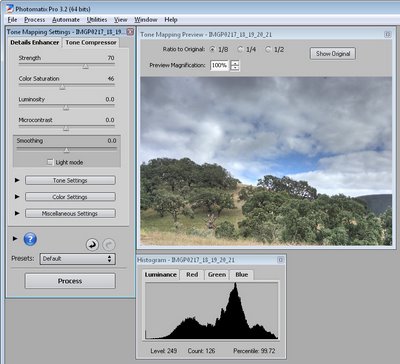
Step 4
Choose Tone Mapping and you'll begin to see the possibilities in the image. Click Show Original to compare the image with what you had previously. You should see enhanced detail in the shadows and in the highlights. 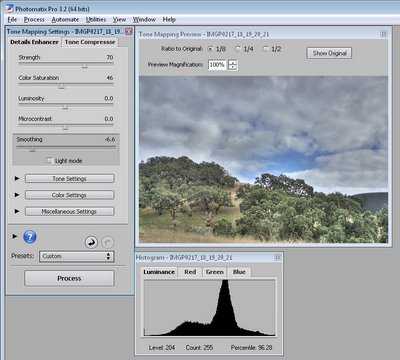
Step 5
To get a surreal effect, from the Smoothing options, select a low value - the lower the value the more surreal is the image and the higher the value the more realistic is the result. Adjusting the Strength downwards will also help you retain more realism if that's what you want.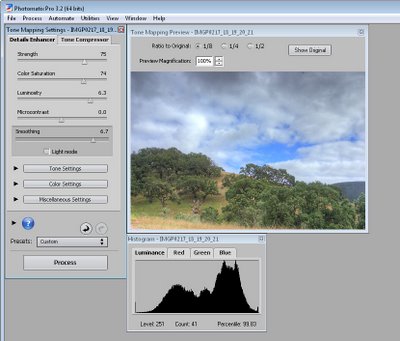
Step 6
Use the Color Saturation slider to adjust the saturation of the colors in the image and use Luminosity to adjust the overall lightness. 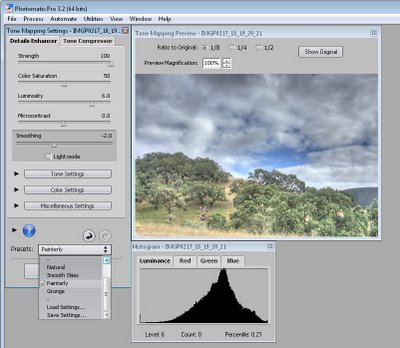
Step 7
There are also presets you can select from in the Presets dropdown list such as Painterly, Grunge, Natural and Smooth Skies.
Step 8
When you have an effect you like, click Process to process the image using the settings you chose.
When the finished image appears, choose File > Save As to save it and you can then open it in Photoshop or another editor to finish working on it.
Labels: HDR, high dynamic range, Photomatix pro, photomatrix

0 Comments:
Post a Comment
Subscribe to Post Comments [Atom]
<< Home