Highlight Color effect in Lightroom

One effect many people like to use with their photos is to remove all the color from the image and leave it in only one place in the image. For example, in a wedding shot you might turn the entire image into black and white leaving just the bride's bouquet in color.
Here's how to achieve this effect in Lightroom using the Adjustment Brush.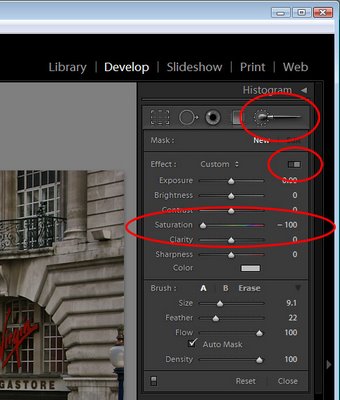
Start with the image selected in Lightroom and switch to the Develop module.
Click on the Adjustment Brush and make sure you have it set to Show Effect Sliders so that you can adjust multiple sliders at once. Drag the Saturation to -100. 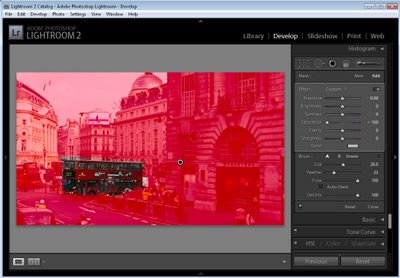
Click the letter O so that you can see as you paint and with a large size hard paintbrush click on the image in an area you want converted to black and white and then paint over the image in all places that it should be turned to black and white.
It will be quicker if you set the feather to a low value, the brush to a large size and disable the Auto Mask option for now.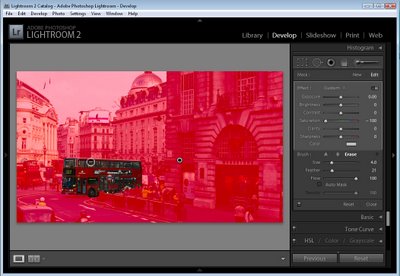
To work close around the edges of the area that you want to leave in color, set the brush size smaller and work slowly around the edges.
If you go too far, press the Alt key (Option on the Mac) and paint out the overlay color. The Eraser uses a different brush so make sure it too is set to have Auto Mask disabled and a low Feather value.
To zoom in click Z and to move the image, press the Spacebar as you drag on it. 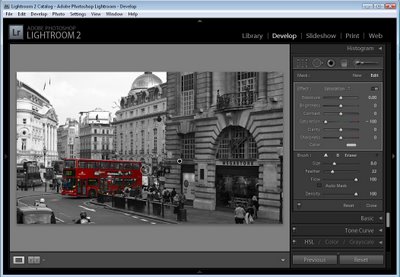
Once you have the area selected that you want to convert to black and white, disable the overlay color by pressing the O key.
This leaves the selected area in black and white and the unselected area in color.
You can now tidy up the edges if necessary by using the Adjustment Brush tool - just make sure that you click on the marker for the Adjustment before you start painting - it should show a black center - if not, you're making a new adjustment and not editing the existing one. 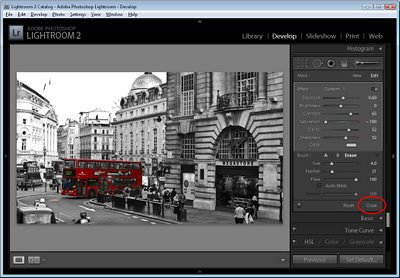
You can adjust the other sliders, if desired, to improve the black and white portion of the image. For example you can boost the Contrast and Clarity if desired. When you're done, click the Close option at the foot of the panel to finish.
In this example I added another adjustment using the Adjustment Brush over the top of this one to reduce the exposure and brightness in the sky to add back some of the cloud detail lost in the conversion of the image to black and white.
Labels: Adjustment brush, highlight color effect, Lightroom 2

0 Comments:
Post a Comment
Subscribe to Post Comments [Atom]
<< Home