Photoshop - fix Chromatic Aberration
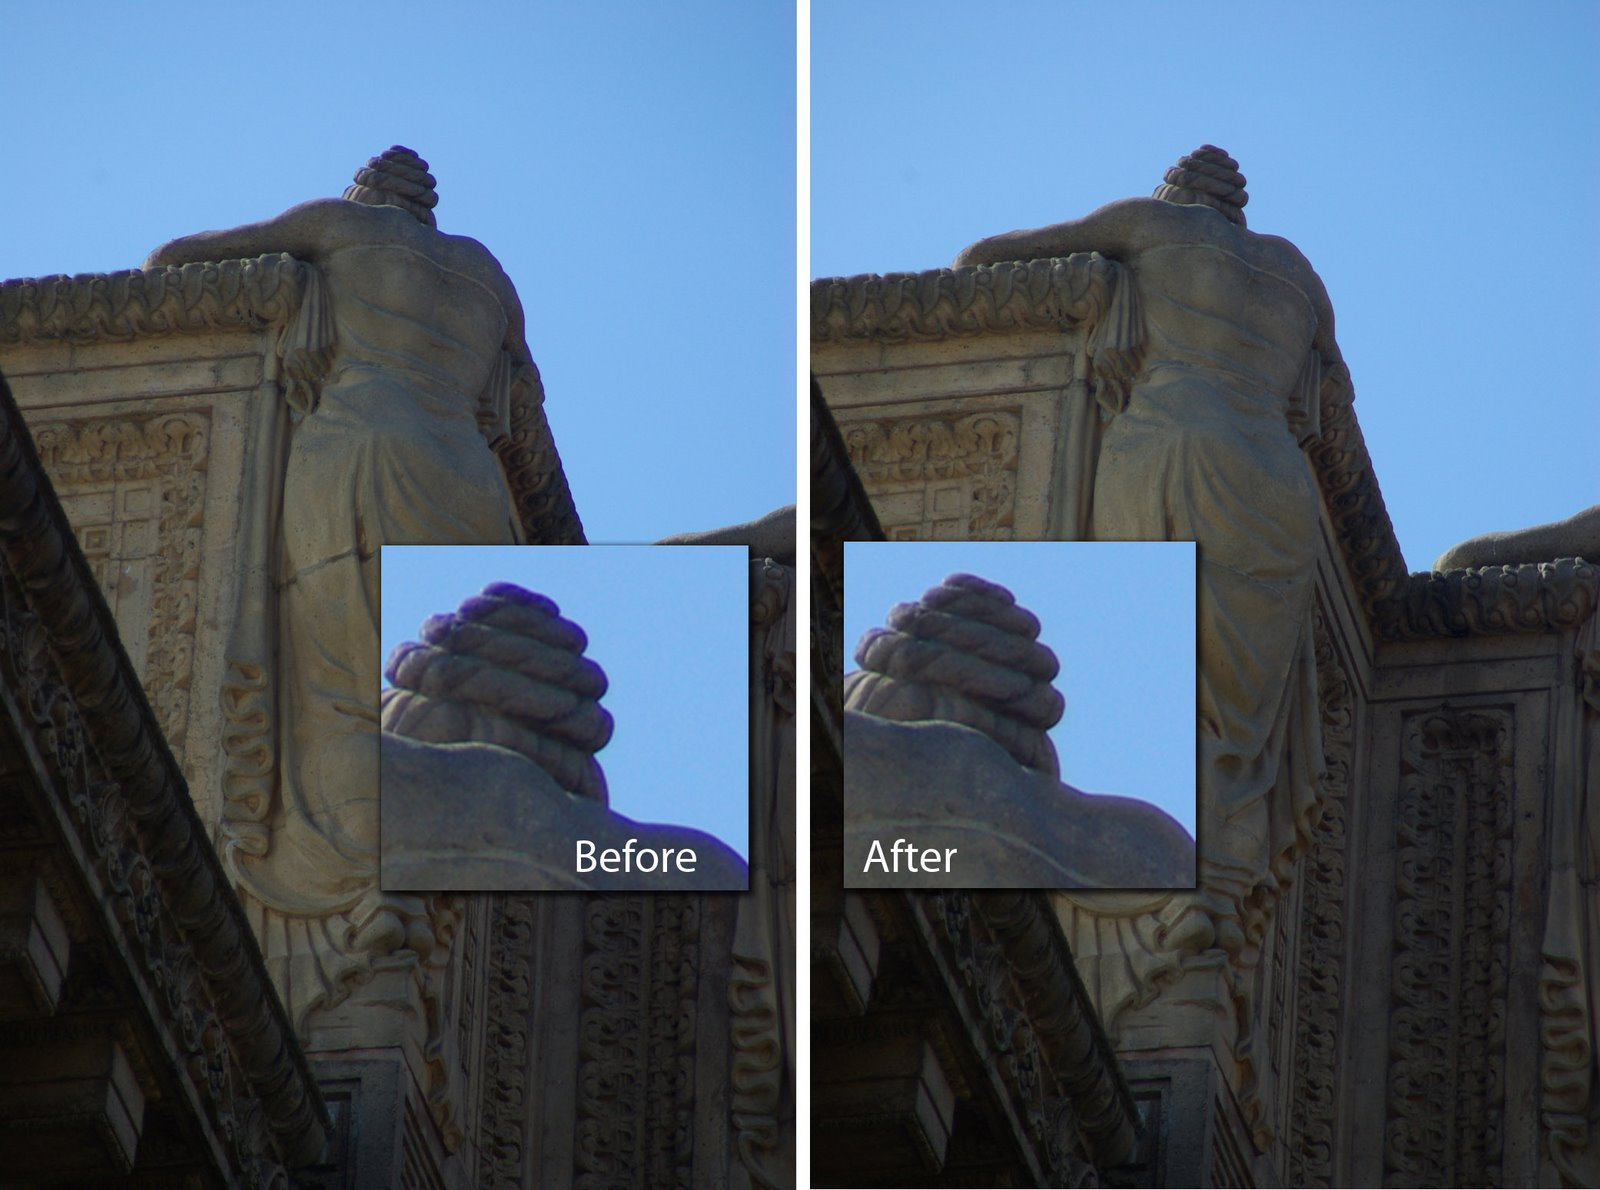
Chromatic Aberration is the bane of digital photographers. It can be seen as a halo or fringe around the edges of an object in a photograph when you photograph it in certain lights – you might see it for example, when you photograph a darker object in front of a bright sky. Some tools like Lightroom have settings that help remove chromatic aberration but sometimes it's so obvious and so distracting that a bigger fix is required.
In this image, the statue has a very obvious blue edge to it and not even Lightroom could fix this. The solution is to open the image in Photoshop and to fix it there.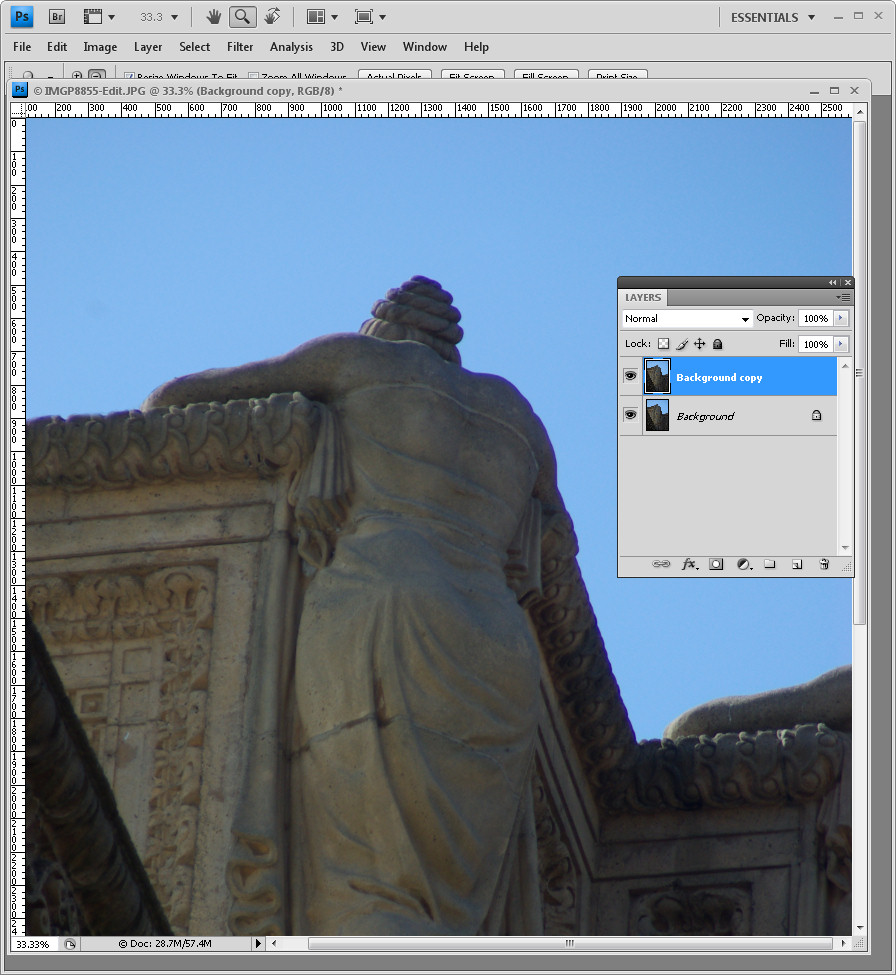
Step 1
Duplicate the background layer by choosing Layer > Duplicate Layer.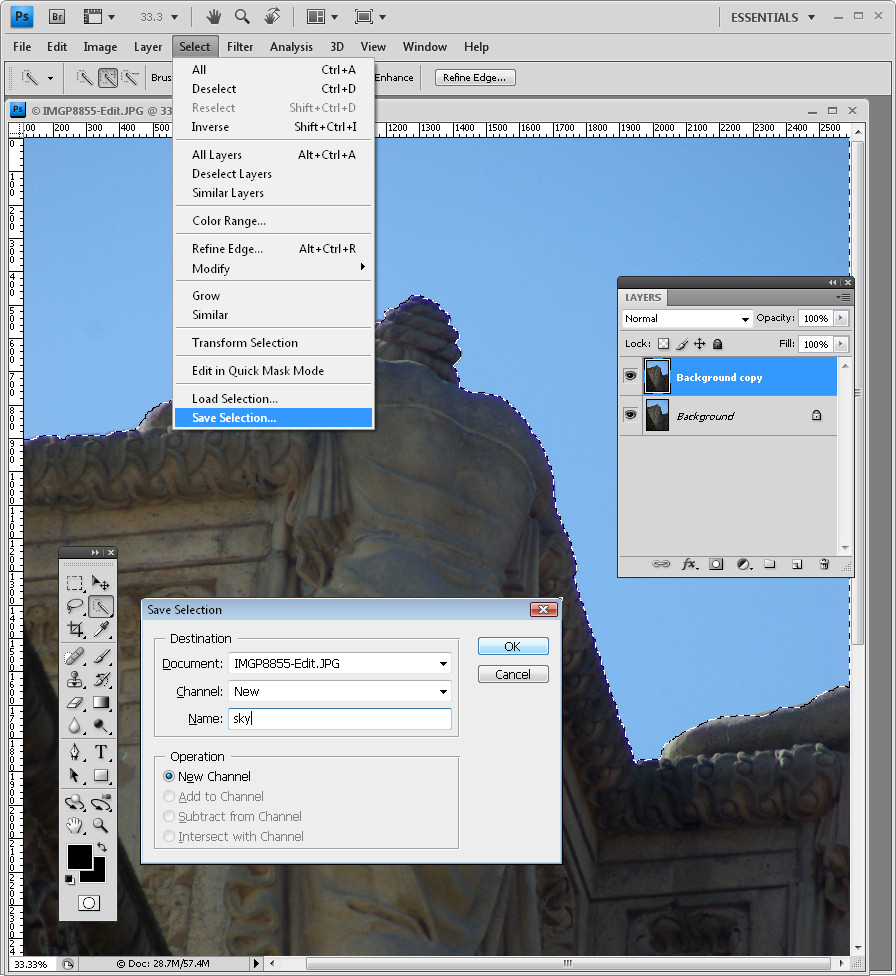
Step 2
For this image, because the problem area is so distinct and the edges are so crisp, the easiest solution is to make a selection of the portion of the image to fix and then apply a fix to it. Using the Quick Selection tool I made a selection of the sky. Save it as a selection using Select > Save Selection and give it a name.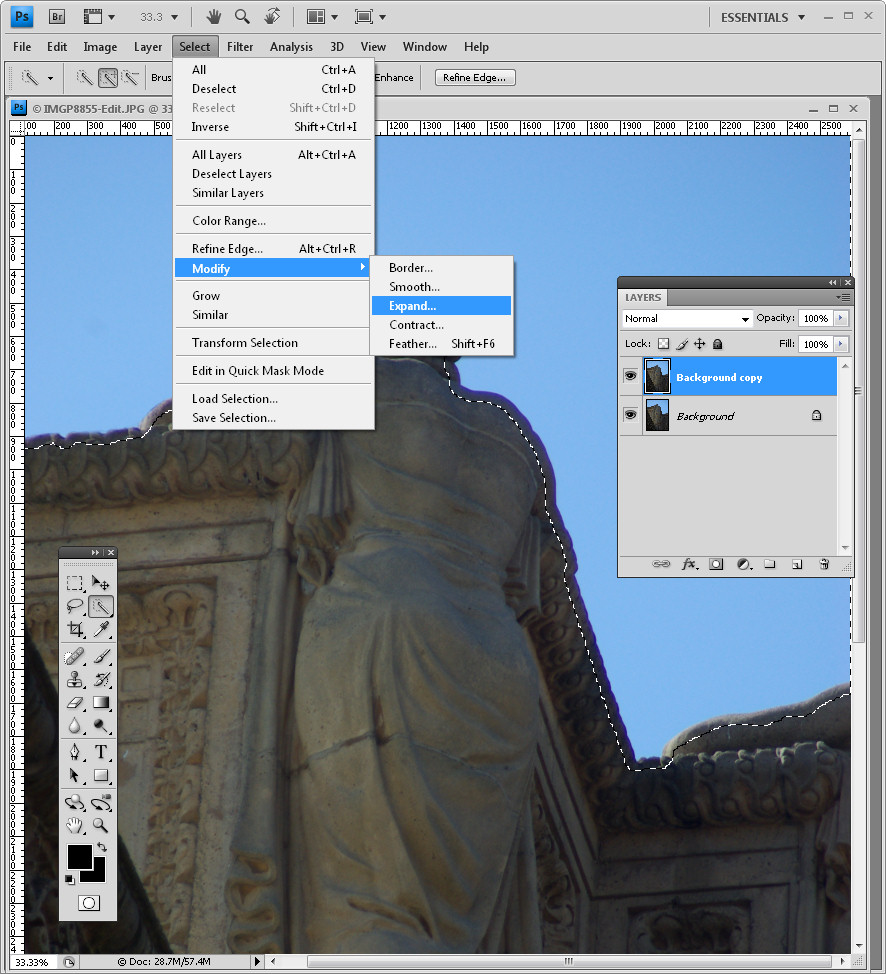
Step 3
Now enlarge it so the selection covers the problem area. I used Select > Modify > Expand and added enough pixels to select over the problem area. How many pixels will be variable – on a high resolution image you'll need a bigger value than on a low resolution image. I used 30 pixels on this large image.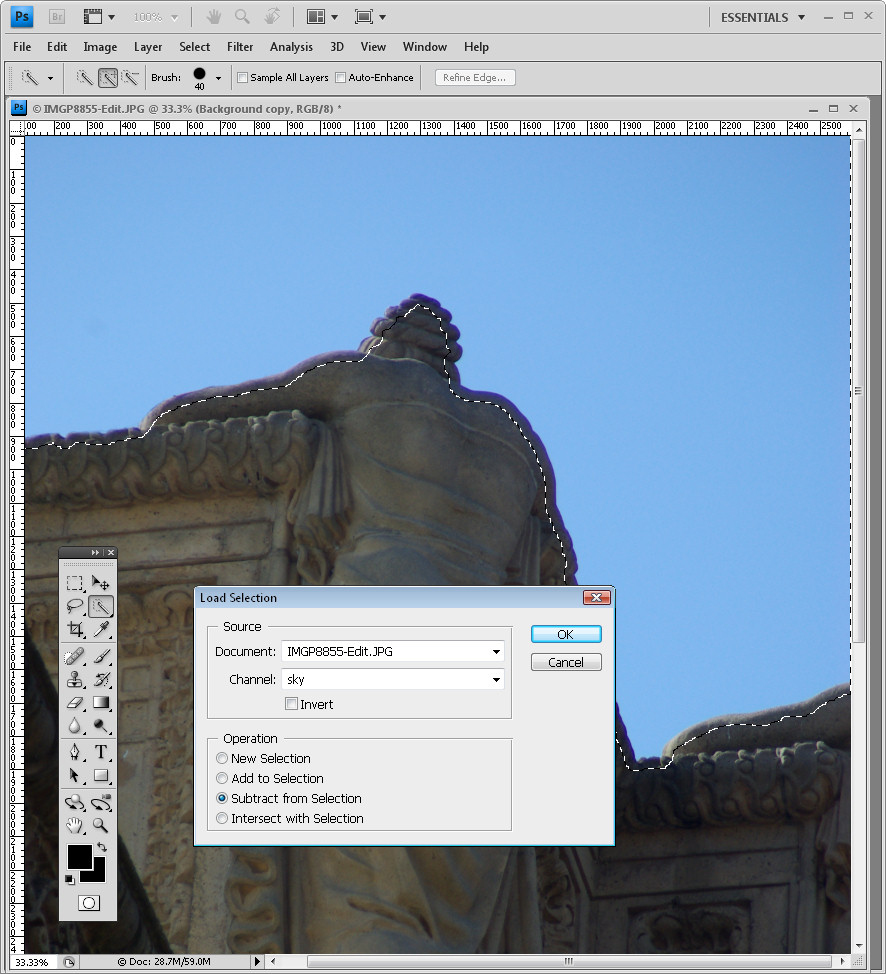
Step 4
Now you need to subtract the first selection you made from this new selection so you end up with just the blue edges selected. To do this, choose Select > Load Selection and select the selection you just saved. Set the Subtract from Selection option and click Ok.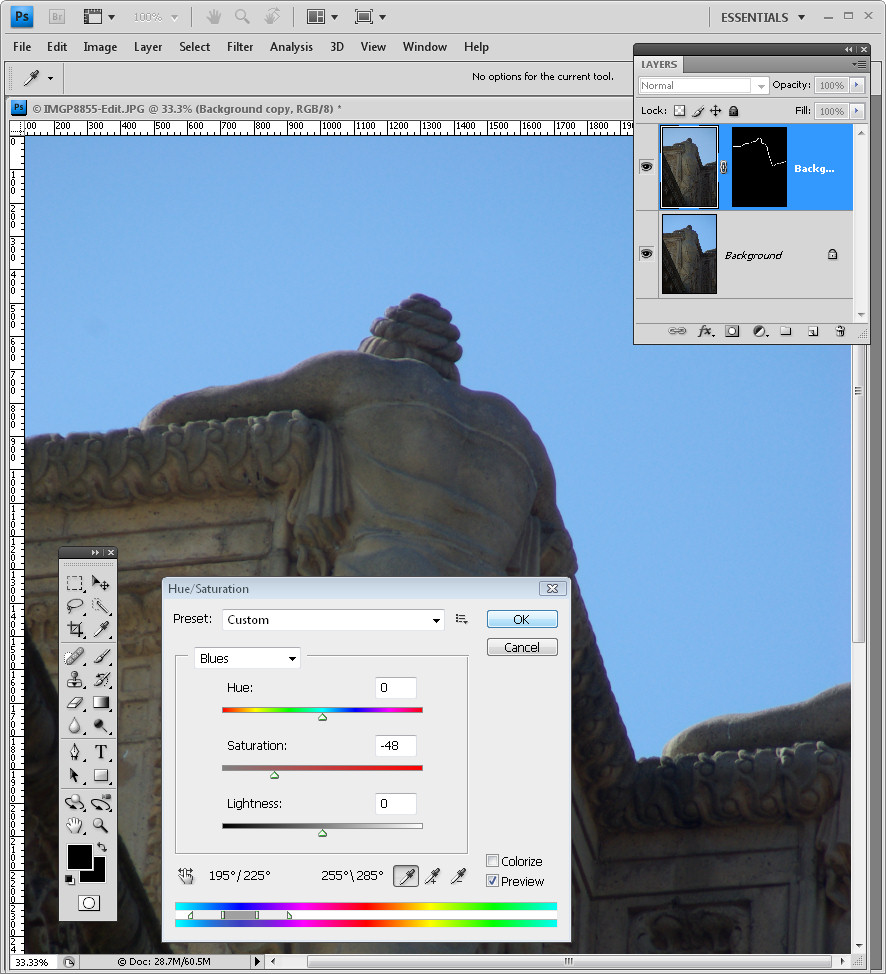
Step 5
You now have the blue area selected so click the Add layer mask icon at the foot of the layer palette to add a mask to this layer. This isolates the blue area in the image.
In this case the simplest way to the problem is to desaturate the top layer so the blue disappears. To do this select the top layer, choose Image > Adjustments > Hue/Saturation and adjust the Saturation down until the blue goes – you can do this on the Master channel or just the Blue and Magenta channels or wherever you find the color problem is residing.
You could also fix the problem using a Curves adjustment and select the Blue channel and adjust it. The exact fix is going to depend a lot on what image data that is affected by the color halo – you need to remove or desaturate some of the blue but keep as much of the remaining image data intact and correctly colored as you can.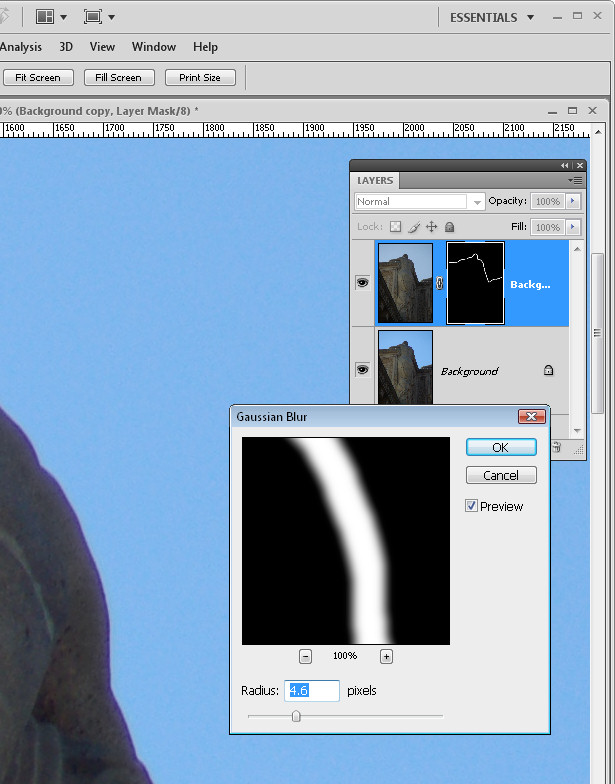
Step 6
If the edge of the fix is too harsh, you can blur the mask layer by selecting the mask thumbnail and choose Filter > Blur > Gaussian blur.
Labels: Chromatic aberration, Photoshop
posted by Jane @ 12:44 PM
![]()
![]()

2 Comments:
Psst. We call it Chromatic Aberration - see
http://en.wikipedia.org/wiki/Chromatic_aberration
or Purple Fringing (there are other colours as well).
In film we deduced that this fringing was a lens problem but in digital, the interaction of the camera lens with the micro lenses on the digital sensor can also cause undesired effects.
"Chromic" sounds like someone is sniffing dope or they fell into some acid.....
Keep writing these articles, they are worthwhile.
Thank you.. I just noticed the spelling problem the other day when I looked in Lightroom and thought... hmmm.. I wonder? Is it Chromic or Chromatic?
Problem is now fixed...thanks for the feedback... consider me coloured with a purple fringe of embarrassment.
Post a Comment
Subscribe to Post Comments [Atom]
<< Home