Articles | Photography Blog | Office Tips Blog | about me | e-mail

Helen Bradley - Photoshop and Lightroom tips and techniques

Saturday, January 23, 2010

Lightroom Presets

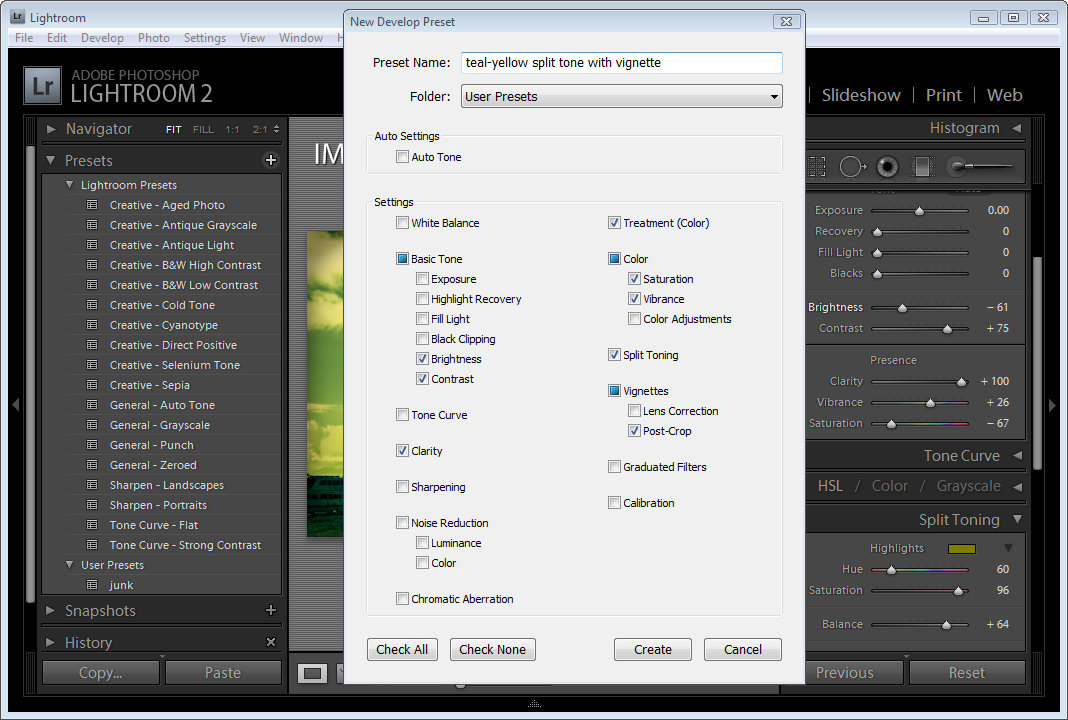
In an earlier post, I explained how to create a custom Lightroom preset that you could use to edit your photos in Lightroom. In addition to creating your own Lightroom presets you can download and install presets from the web into Lightroom so you can use them anytime you like.

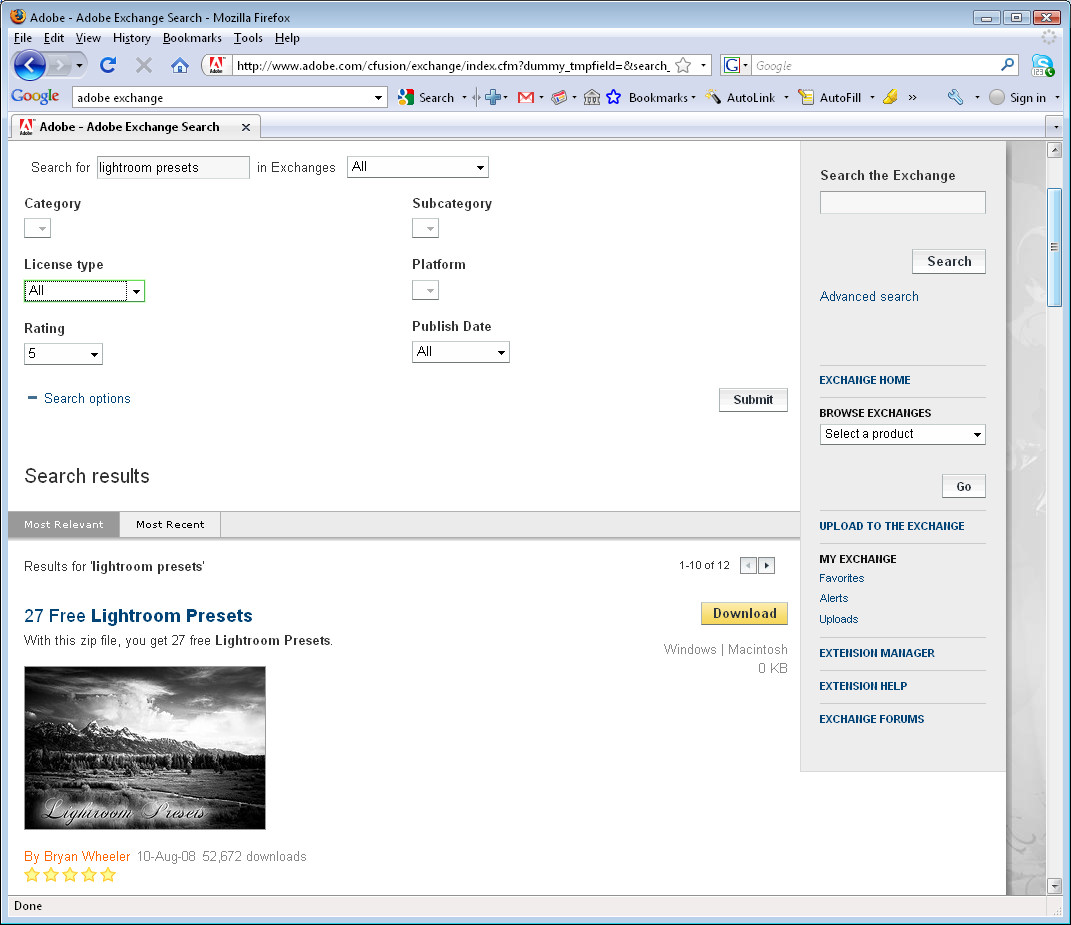
To begin, you’ll need to locate some presets to use. A good place to start is at Adobe Exchange: http://www.adobe.com/cfusion/exchange/ and search for Lightroom presets. Download a set of presets to your computer. In most cases this requires you to download and save the file to your computer and then you need to unzip its contents. Place the unzipped files in a folder that you can find easily.

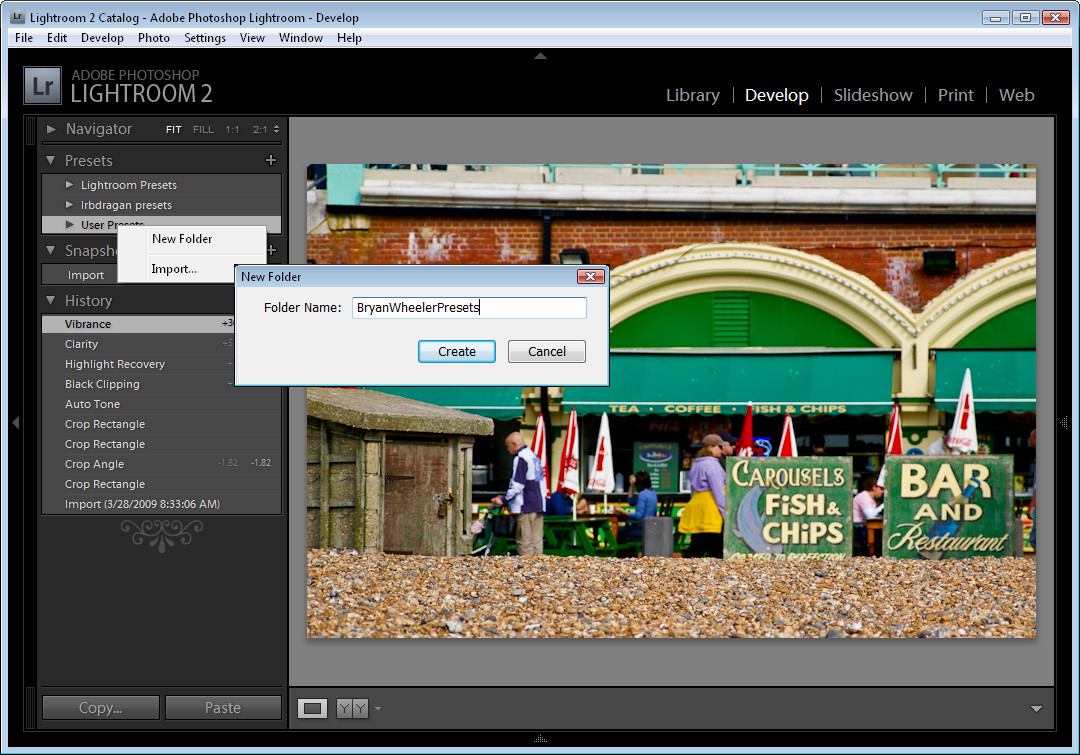
Once you have done this, launch Lightroom and click to open the Develop module. Choose User Presets and, if desired, create a new folder for the presets by selecting New Folder and type the folder name. I like to do this so I can keep my presets separate to other people's.

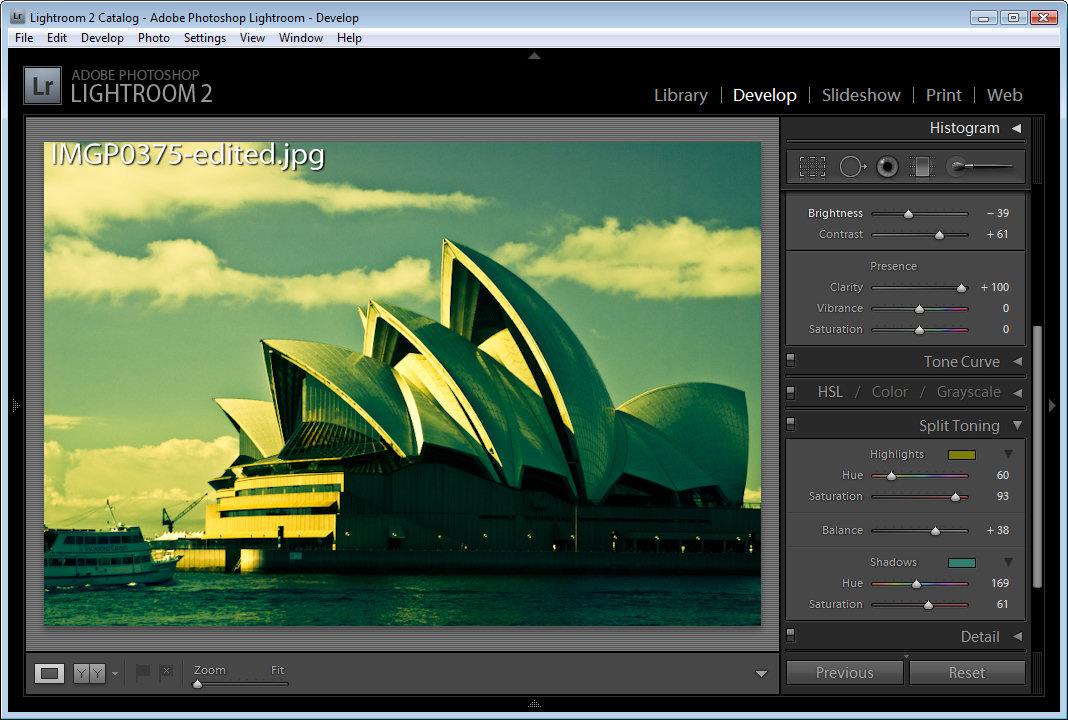
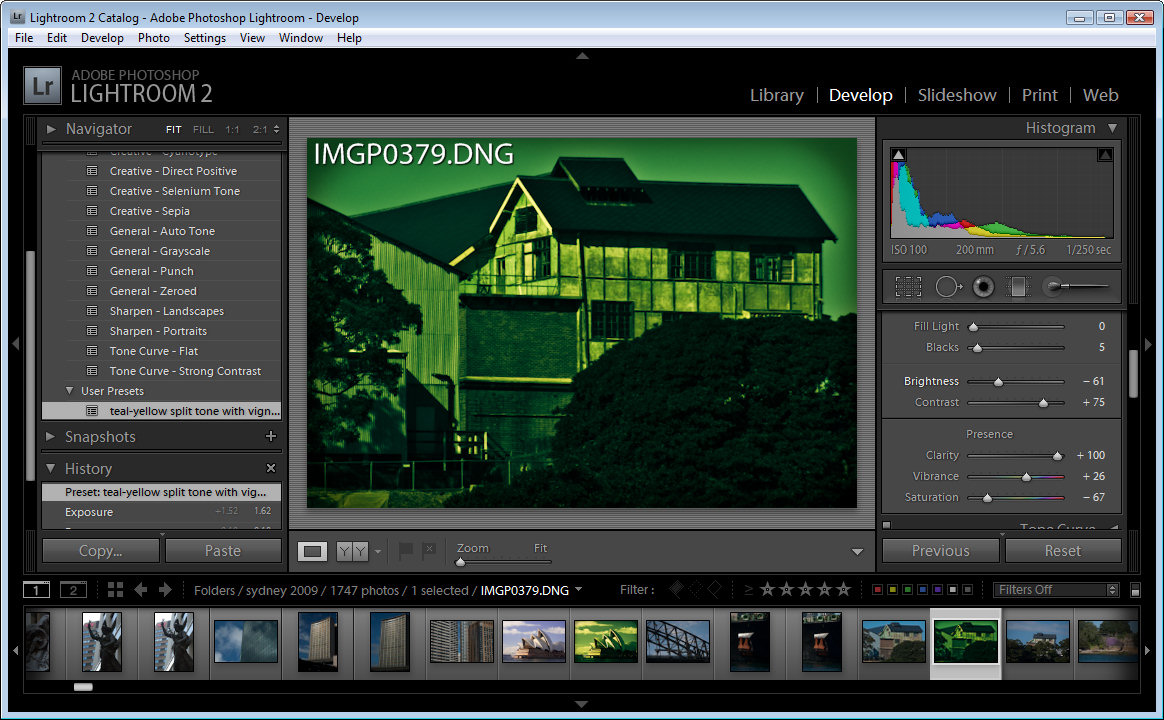
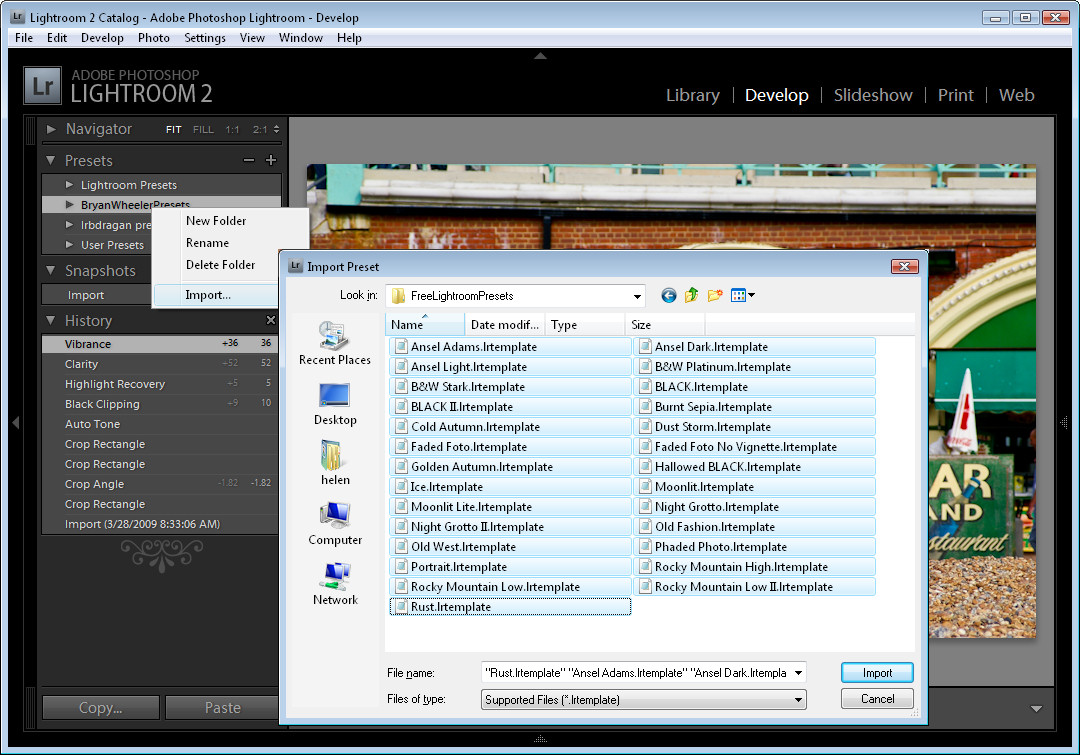
Once you have created the new folder, right-click it and click Import. Navigate to where you saved the preset files you downloaded, select them and click Import. The presets will be added to your Lightroom Preset collection. Chances are that one will be applied to your image too! Press Control + Z (Command + Z on the Mac) to undo it.

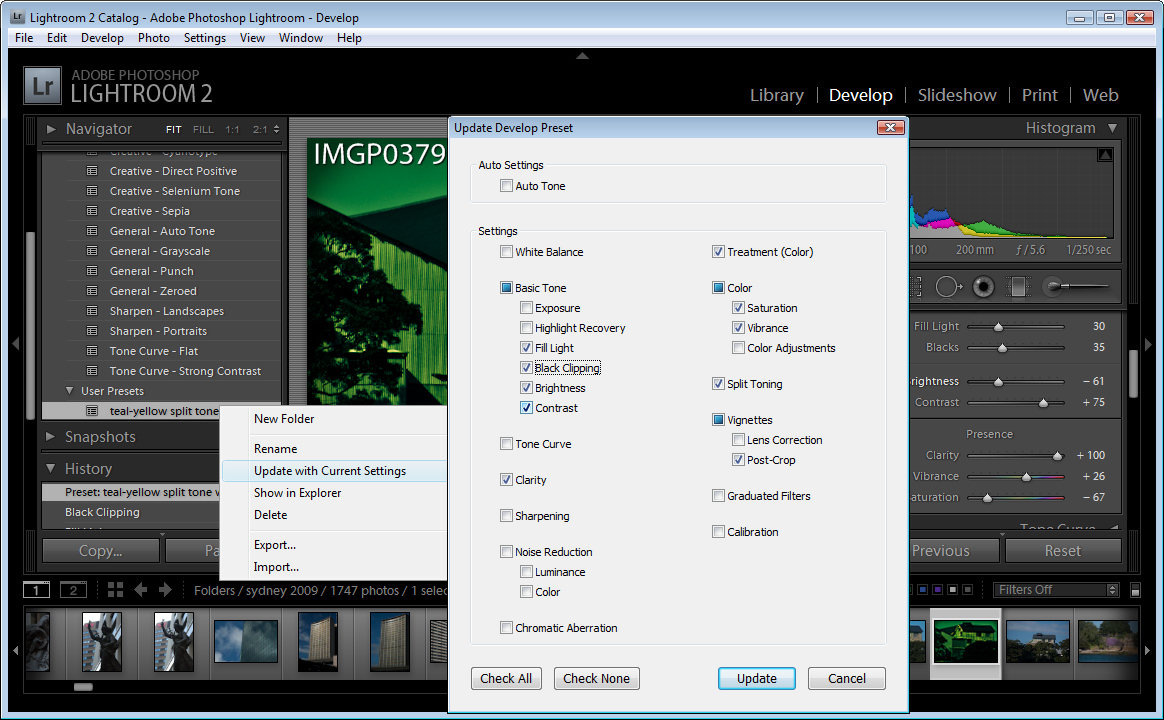
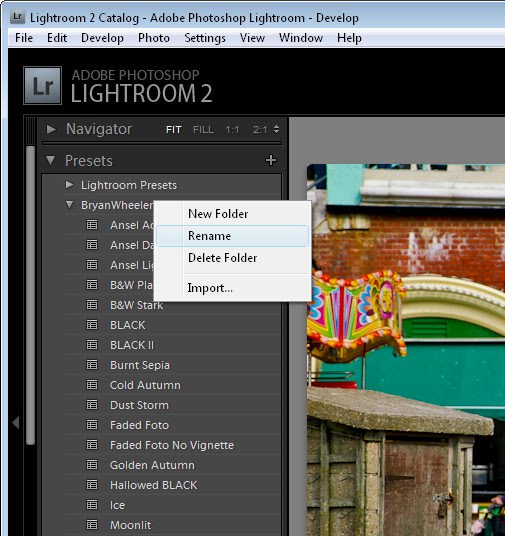
You can rename a folder by right clicking it and choose Rename and you can also delete a folder if you decide you don't like the presets or simply remove individual presets by right clicking the preset and click Delete.

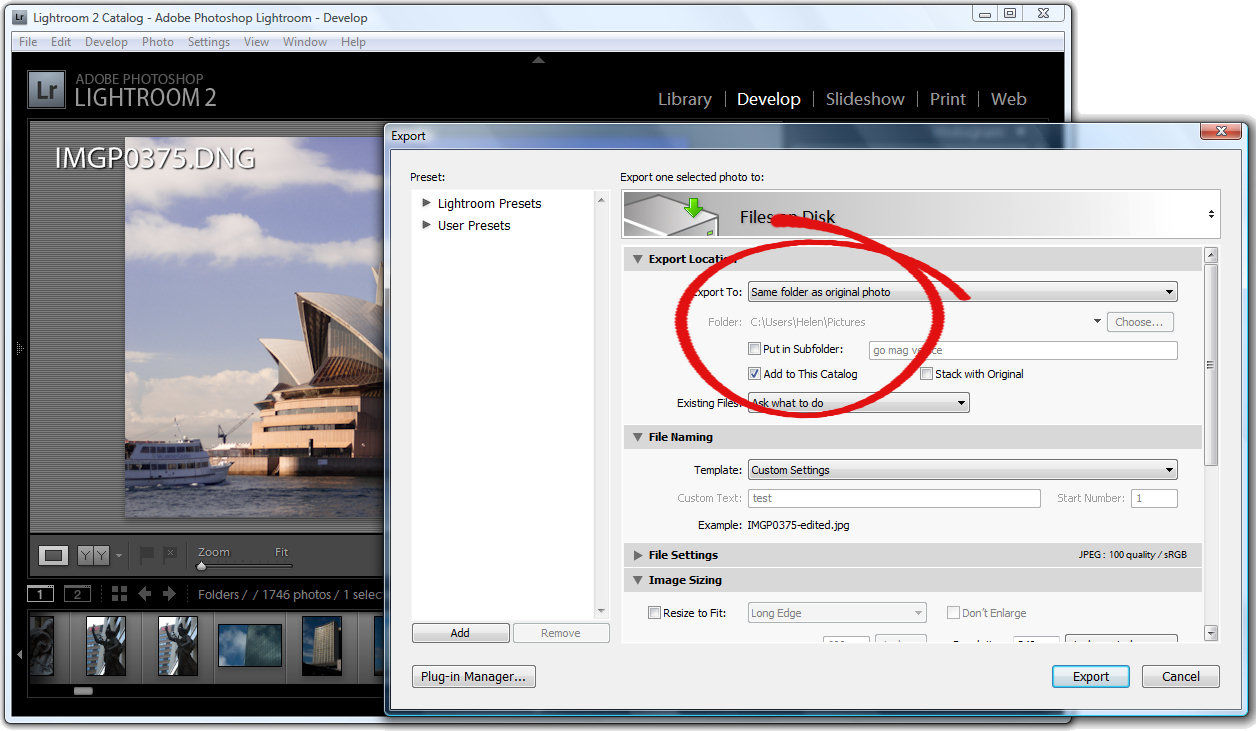
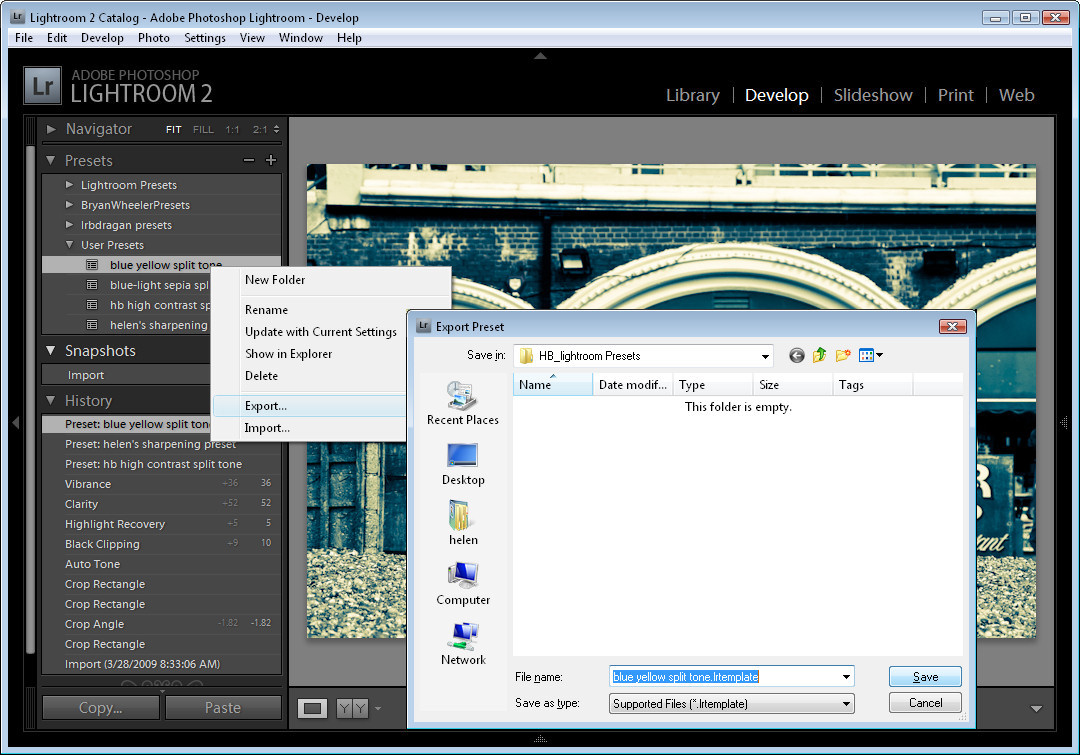
You can also share your presets with others. To do this, right-click a preset that you have created and choose Export. It is exported by default with its current name with the extension LRtemplate which is the extension that identifies it as a preset. To share your presets with others you can either send them the LRtemplate file so that they can import it into Lightroom themselves or zip a number of presets into a single file of presets and distribute that.

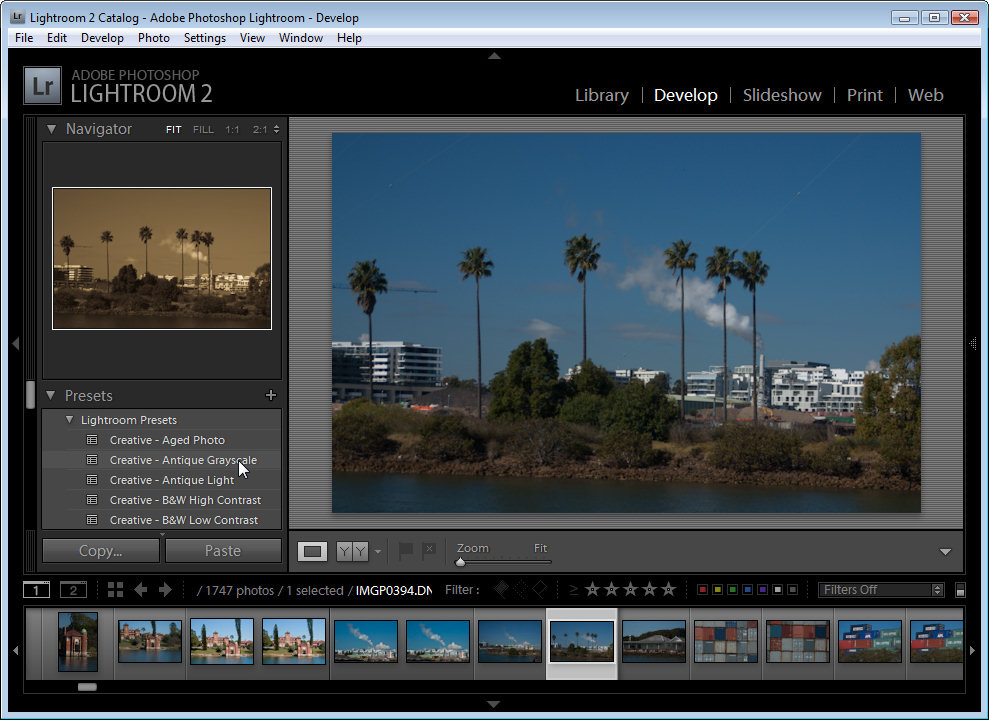
Even if you do not want to create your own presets, you’ll find that there are plenty of cool presets available on the web that you can download and use.

Labels: ,

Tuesday, January 19, 2010

Split toning in Photoshop

By Helen Bradley

Split Toning is an effect which has its origins in the days of film and it involves tinting the highlights in a black and white image one color and the shadows another color. The best results are where you use opposite colors for each, such as yellow and blue, green and magenta and so on.

If you are a Lightroom user you've probably experimented with the very cool Split Toning tool in the Develop module. However, you can achieve a similar effect in Photoshop with just a little more work.

Here's how to create the effect in Photoshop:

Start by creating a black and white image using your favorite tool in Photoshop. I'm using Photoshop CS4 so I'm using the Black & White filter but you could use the Channel Mixer or Hue/Saturation and drag the Saturation slider into -100.

To create the split tone effect you can use a Color Balance adjustment layer as it lets you isolate the highlights and shadows in the image and to apply different colors to each. To start, choose Layer > New Adjustment Layer > Color Balance and click to select the Highlight tones. Now adjust the color sliders until you get a pleasing color in the image highlights.

Click the Shadows tone selector to isolate the shadows in the image and adjust the color sliders to get a pleasing color in the Shadows.

If necessary you may want to select the highlights again and fine tune the color used so it complements the color you've chosen for the shadows.

You can consider your image done for now or you can apply a filter effect. Here I've created a flattened image layer by pressing Control + Alt + Shift + E (Command + Option + Shift + E on a Mac) and applied a Diffuse Glow filter (Filter > Distort > Diffuse Glow) to it before blending the layer back into the underlying image.

Labels: , ,

Friday, January 15, 2010

Photoshop: Painting a Photo


While Photoshop includes some filters you can use to apply a painted effect on your photos, you can also paint them yourself very easily. This way you can achieve a custom look as you paint.

The process involves using the little known Art History brush in Photoshop to do the work, here's how:

Open your image in Photoshop. You don't need an image that is in sharp focus (which makes this process a good one for dealing with a slightly soft image), but it should be well exposed and have a good range of tones. If necessary, apply a Curves, Levels or Exposure adjustment to the image. Flatten the image.

If you resize or crop the image, you must save it and reopen it - the Art History Brush won't work if you don't. Ditto, if you’re working in 16-bit mode you'll get a program error if you try to use the History Brush so use Image > Mode and select 8-bit then save and reopen the file.

Duplicate the background layer of the image 4 times. Name your layers (from the bottom up): underpainting, detail, fine detail and color highlights. Hide the three top layers and select the underpainting layer.

Select the underpainting layer's contents by Control + clicking on the layer thumbnail (Command + Click on the Mac) and press the Delete key to remove everything from this layer. Deselect the selection by choosing Select > Deselect.

Click the Art History Brush (it shares a palette position with the History Brush Tool), select a brush shape to use and make it a fairly large size. Choose a Style such as Tight Short and an area value of around 50px and paint all over this layer. All you want right now is some general color but no detail at this stage.

Click the detail layer and turn its visibility on. Select its contents and delete them. Make your brush smaller in size and now paint on this layer to bring back some of the image detail. Experiment with different settings in the Art History Brush toolbar such as Dab, Curl and Tight. If you get an error stating that the brush won't work because the history state doesn’t contain this layer, view the History palette using View > History and click in the left column opposite one of the Duplicate layer states to make it the one to paint from.

Once you have some detail in the painting, click the fine detail layer, delete its contents and paint on this layer using a very small brush. This time focus on the elements you want to see in some detail such as the horse.

Select the color highlights layer, make it visible, delete its contents and using a slightly smaller brush, this time just dab a few small scattered brush strokes on the image, you want a smattering of detail but not much at all. With the layer selected, choose Image > Adjustments > Hue/Saturation and drag the Hue slider a little to the left or tight and adjust the Saturation to a little higher value. This changes some of the color and detail in the image to give it a more painterly look.

When you have a result you like, select the top layer of the image and press Ctrl + Al + Shift + E (Command + Option + Shift + E on the Mac) to create a new layer with a flattened version of the image on it. Choose Filter > Texture > Texturizer and apply a Canvas texture to the image.

You can back off the effect by decreasing the Opacity of the top layer to reveal some of the detail from the layers below.

Next time you're looking to create a painting from an image, consider by passing the filter menu and use the Art History brush to make your own custom painting.

Labels: , ,

Wednesday, January 13, 2010

New free Steampunk brushes


steampunk_brushes_image

I just made a set of fun Photoshop steampunk brushes. They are made from clock parts and they have a photographic quality to them. The collection includes a range of gears and some funky metal bits too. They are sized upwards of 600 pixels and some are as large as 2400 pixels.

They are free brushes for personal use and an inexpensive commercial license is available.

You can download them from projectwoman.com.

Labels: , ,

Tuesday, January 12, 2010

Lightroom Presets


One of the cool things about Lightroom is its ability to store develop settings as Presets so you can use them again later to edit other images.

In addition to creating and saving your own presets, you can also download presets from the web and use them in Lightroom.

In this post, I’ll show you how to create a Lightroom preset and in a future post, I'll show you how to download and install Lightroom presets you find on the web and also explain how you can share your own presets with others.

To get started with presets in Lightroom, select an image in the Develop module which is ready for some creative attention. Just be aware of any settings you have already applied to the image as these will be included in the preset if you don't specifically exclude them. If you have done a lot of work to get the image to this stage, export a copy and re-import it back into the catalog – there's an option that does this in one step in the Export dialog. If you now select and work on the edited version, only the upcoming changes will be included in your preset.

Now you’re ready to work creatively on the image. For example, to split tone the image, start by increasing the Contrast in the image and reduce the Brightness a little to compensate. Adjust the Clarity to a high value so you get more sharply defined edges.

In the Split Toning options, for the Shadows click to select a dark blue/teal color and adjust its Saturation to suit. For the Highlights, select a mustard yellow and adjust its saturation to suit.

Adjust the Balance slider to favor the shadows or highlights as desired.

You may want to decrease Saturation and Vibrance or tweak other color settings to get the result you want. Here I added a Vignette too.

To save the settings as a preset, locate the Presets panel on the left of the Develop panel. Click the plus sign to the right of the word Presets to open the dialog.

Give the preset a name that describes what it does, in this case I called mine, 'teal-blue split tone with vignette'. Disable any options that you don't want stored with the preset – leaving selected only the options you have configured and want to use on every image.

For example, I set a Split Toning, added a Vignette and adjusted Brightness, Contrast, Clarity, Vibrance and Saturation.

When you’re done, click Create.

You’ll now find your preset in the User Presets collection and you can click it to apply it instantly to any image in future.

In some instances you may need to edit the image after applying the preset to it to fine-tune the effect for that image.

If you find that your Preset isn't working quite as well as you imagined it would and if, for example, you always seem to make a particular change to the image after using it such as brightening it a little you can save an edited version of the preset without having to create it from scratch.

To do this, apply the preset and make your change. Then right click the preset and choose Update with Current Settings.

Select the settings to save in the preset and click Update. In future when you apply this to your images it will be applied using these new settings.

You’ll also find that a number of Presets ship with Lightroom. These are in the Lightroom Presets list. Click on any of them to apply it to your image. To see how the image might look with a preset applied, make sure that the Navigator is visible so you can preview the effect without actually applying it to the image.

In later posts, I’ll look at downloading, installing, exporting and sharing Lightroom presets.

Labels: , ,

Sunday, January 10, 2010

Photoshop: Selective fixes using masks


Sometimes a photo needs its tonal range fixed but some areas of the image may not need the same fix as others. Here's how to limit the fix to a selected portion of an image using a mask.
Look at this photo and noticed that on the left are the light and highlight areas and on the right are the dark areas. The camera has exposed primarily for the light areas in the image and the darks are very black. I need to fix each side of the image independently of the other. Step 1
To fix the image make two copies of the background layer so that you do your work on duplicate layers. To do this, right click the Background layer in the Layers palette and choose Duplicate Layer and then repeat this step once more. Disable the visibility icon on the topmost layer and select the middle layer.Step 2
To bring detail out of the shadows, choose Image > Adjustments > Shadows/Highlight and adjust the Shadows but leave the highlights untouched. Typically the default setting will be all you need. Ignore any effect this fix has to the lighter areas of the image. Step 3
Now enable the visibility icon on the top layer and select it so you are working with this layer. Choose Image > Adjustment > Levels and adjust the levels to improve the contrast in the lighter areas of the image – ignore the darker areas as they have already been fixed. You can also adjust the saturation using Image > Adjustments > Hue/Saturation if desired.
Step 4
The top layer contains the adjustment for the light values and the middle layer contains the adjustment for the dark values. To blend these layers, use a layer mask to selectively adjust the opacity of a layer.

Unlike the layer opacity slider which sets every pixel to the same opacity value, a mask lets you adjust the opacity selectively so one area can be 100% opaque and others can be partially or fully transparent.

To do this, click to select the topmost layer and click the Add Layer Mask button at the foot of the layer palette to add a white layer mask to this layer. When working with masks, "black conceals and white reveals" so the white mask reveals everything on the top layer and the image is unchanged. Step 5
Set the foreground colour to black, select a round brush and set its Opacity to approximately 20%. Click in the mask to select it and paint over the dark areas of the image to reduce the layer opacity and to allow detail from the layer below to show through. Using a low opacity brush lets you reduce the opacity gradually.

Continue and paint over the area to make more transparent. It may help to turn the visibility of the top layer on and off to see what detail is available on the layer below that you may want to recover. Make sure to select the layer mask again before painting to reduce the layer opacity.

Labels: ,

Friday, January 08, 2010

Video! Painting with the Art History Brush in Photoshop

Here is a new video on painting with the Art History Brush in Photoshop:

A video on how to paint a photo using the Photoshop Art History Brush.

Labels: , , ,

Wednesday, January 06, 2010

Photoshop - Clip an image to a shape

For scrapbook projects, photo crafting and other creative uses you can achieve a cool effect for your photos by clipping your favorite images into shapes. Here's how to do it:Step 1
Open an image and make the background layer a regular layer by double clicking it in the Layer palette and click Ok.

From the Photoshop’s Custom Shapes collection, select a shape and set the Shape tool to Fill Pixels in the Tool Options palette - ignore the color that you have selected for now. Step 2
Add a new layer to the image by choosing Layer > New > Layer and drag to create the shape on that layer. Use the Move tool to rotate the shape, size and move it. Step 3
Drag the background layer above the shape layer. Select the top layer and choose Layer > Create Clipping Mask to mask the image to the shape. Step 4
Add a drop shadow or other effect to the shape layer to set it aside from the background. You can also add a new background layer and fill it with a color or texture to show off the image.

If you drag the shape into a different position in the image using the Move tool or scale it, you will reveal more or less of the top image.

Labels: ,

Monday, January 04, 2010

Video - Fixing animal eyes in Lightroom

Here is a video presentation of a recent blog post on fixing animal eyes in Lightroom.

How to use the Adjustment Brush in Lightroom to fix dull and dark animal eyes.


I am working on changing the size of the videos. A few of these were made for a special job and they are different sizes than I would actually want to use in future. I am aiming for some that are taller than this and narrower so they fit in the post layout more comfortably.

Labels: , ,

Saturday, January 02, 2010

Photoshop - Cool fix for an underexposed image


My camera seems to shoot consistently on the side of underexposing images and while sometimes an exposure adjustment will solve the problem I often need a stronger fix.

This is when Lab color can help out. This color mode has special characteristics in that it can handle very bright colors differently than RGB mode does and it can be used to boost brightness in an image while at the same time ensuring that color isn't lost when you do this using screen blend mode. Here is a simple fix for underexposed images - if you like it you can create it as an action so all you have to do is run the action then tweak the opacity of the top layer to get the result you want.

Step 1


Right click the background layer of the image and choose Duplicate Image. Choose Image > Mode > LAB Color and select Don’t Flatten.

Step 2


Choose Layer > New Adjustment Layer > Levels and click Ok twice. This applies a levels adjustment with no change to the image. Set the layer blend mode to Screen.

Step 3


Select the Levels adjustment layer in the layer stack and choose Layer > Merge Down to merge this layer into the layer below. Choose Image > Mode > RGB Color and select Don’t Flatten to return to RGB Color with both layers intact.

Step 4


Right click the top layer (it's the duplicate background layer) and choose Duplicate Layer and click Ok.

Select the middle of the three layers and set its blend mode to Luminosity.

Select the topmost layer and set its blend mode to Color.

Adjust the opacity of the top layer until you get an acceptable amount of color in the image.

Labels: , ,

Friday, January 01, 2010

All New! Video Tutorial, Fix a Sky in Photoshop

New for the New Year!
I am trialling some videos for the site and here is the first of them.

It is a video rendition of a recent post from my blog, but this time you get to see it in action rather than read about it.

This video shows a simple and effective way to replace a blown out sky in Photoshop without having to make a complex selection to do so.


Let me know by posting a comment if you like the concept of viewing video tutorials. I plan to offer a mix of both videos and text but I'd love to hear what you think.

Labels: , , ,