Photoshop image framing template
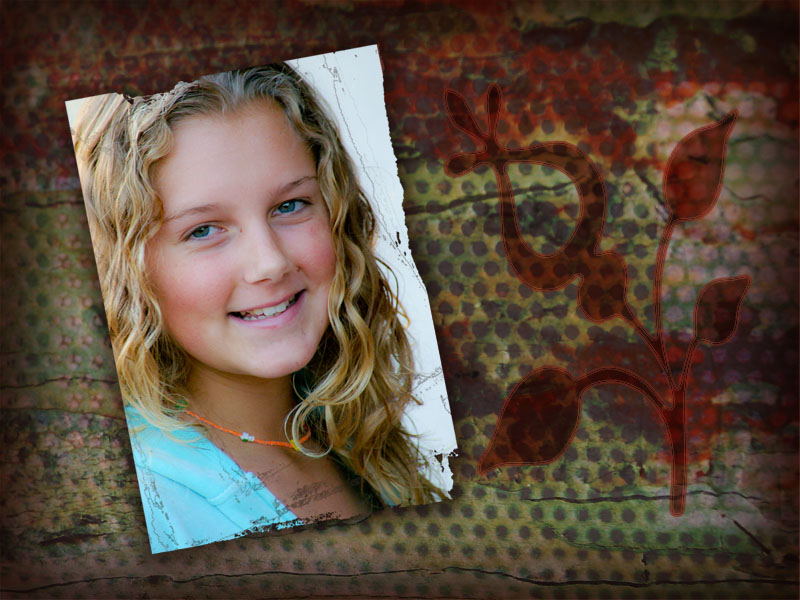
I love things that look good and which are simple to use and this custom framing technique is one of them. Here's how it is done:
Step 1
Open an image to use as a template background. Here I’ve stacked two texture photos on top of each other and blended them with the Color Burn blend mode. I then added another layer with a brown blurred edge to give the design a vignette effect.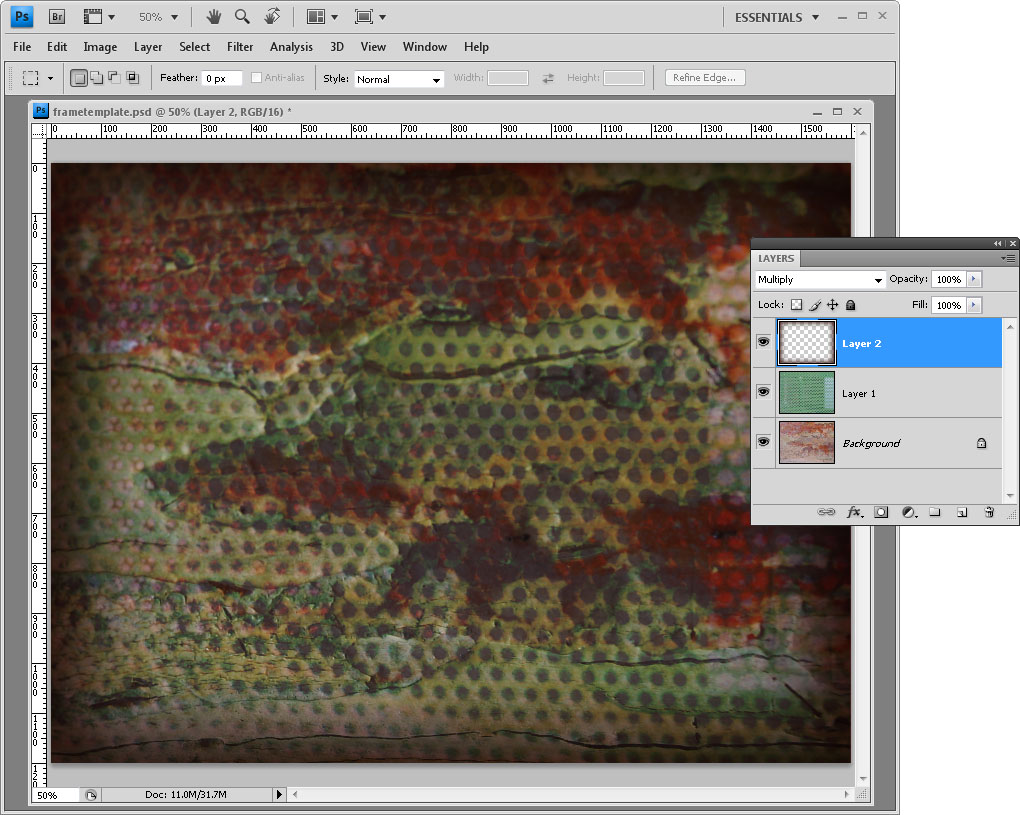
Step 2
Next create a new layer on the image and make a selection on it for the photo. Fill the selection with a solid colour. You can, if desired, add a grunge layer mask to this layer as I have done - I used a grunge edge from Graphic Authority and added a blended flower for decoration. I think the Graphics Authority grunge effects totally rock.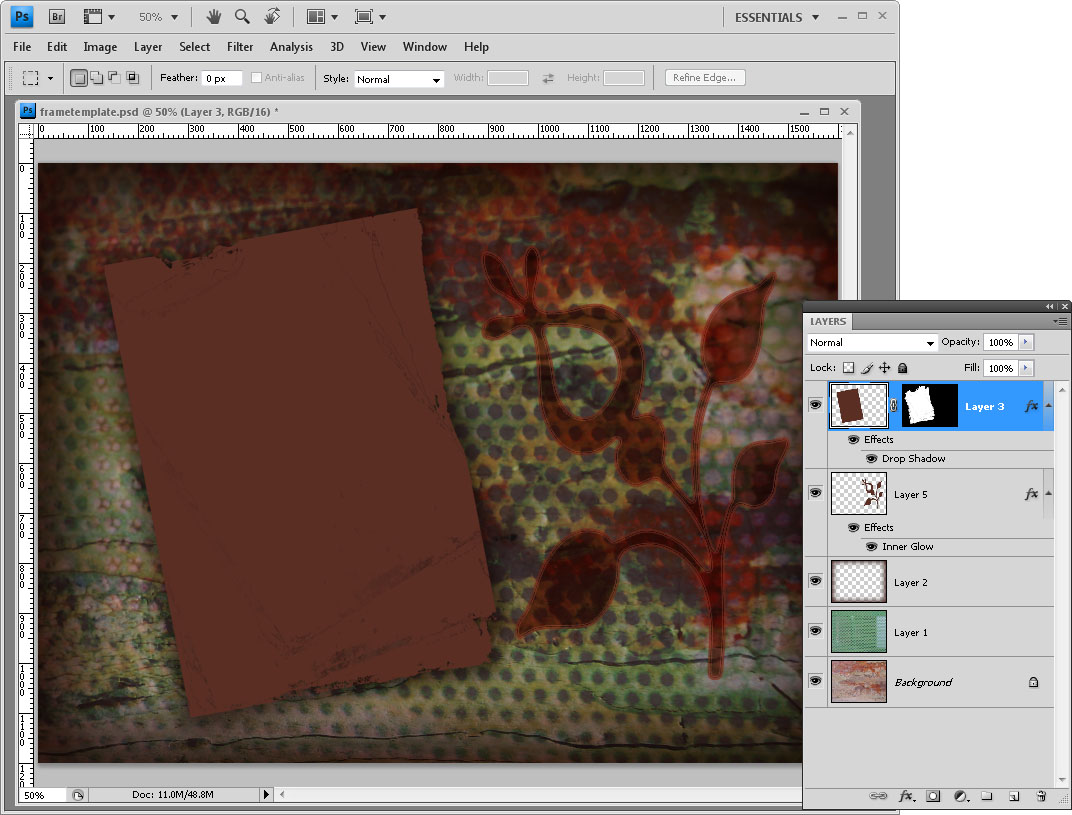
Step 3
Open the photo to frame with this design and drag its background layer into your template design. Rotate the image to match the rotation of the shape on the layer below and drag it on top of that shape. Choose Layer > Create Clipping Mask to mask the image to the shape below. 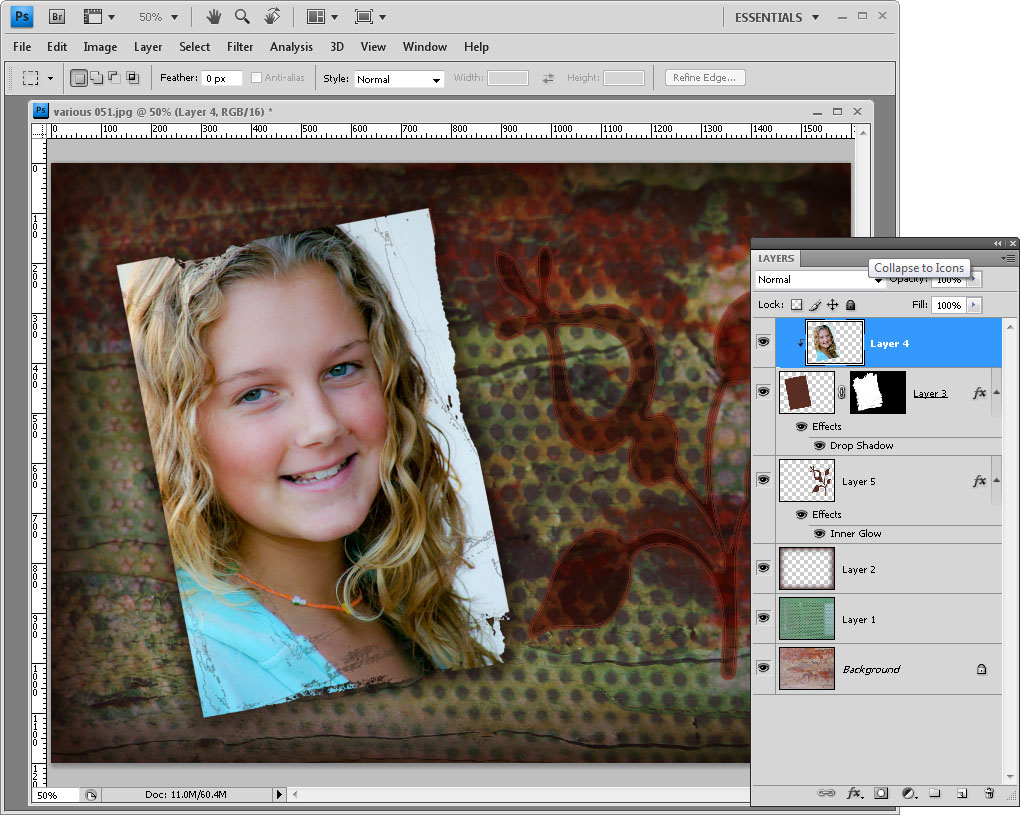
Once it is made, you can reuse this template by simply replacing the image layer.
Labels: clipping group, clipping mask, Photoshop, Photoshop Creative, template
posted by Jane @ 9:38 PM
![]()
![]()

0 Comments:
Post a Comment
Subscribe to Post Comments [Atom]
<< Home