Photoshop: Fixing photos shot from airplanes
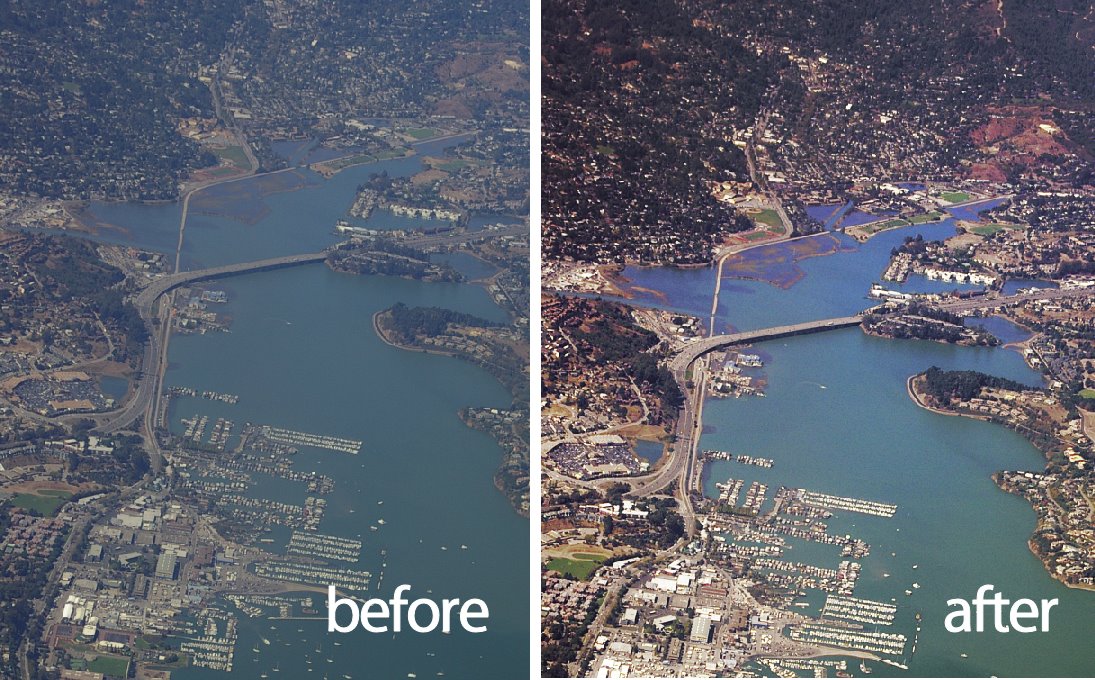
One of the cool things about getting a window seat in an airplane is that you get a unique opportunity to photograph things from a high vantage point. On the flipside, when you get them home you often find photos taken from the air look washed out and the colour is poor. Luckily there is not much that Photoshop can’t recover provided the photographs are in focus. So if you scored a window seat lately and if you have images that fix, I'll show you the Photoshop tools you need to fix them.
Understand the problems
Most airplane photos look washed out and they don’t have the richness of colour that you might expect them to have. The first step in fixing them is to boost the tonal range in the image using a levels adjustment - a by product of this is that the colour gets a boost.
Step 1
Start by making a duplicate of the background layer so that you're working on a copy in case you need to refer to it later on. To do this, right click the background layer in the layers palette and choose Duplicate Layer. 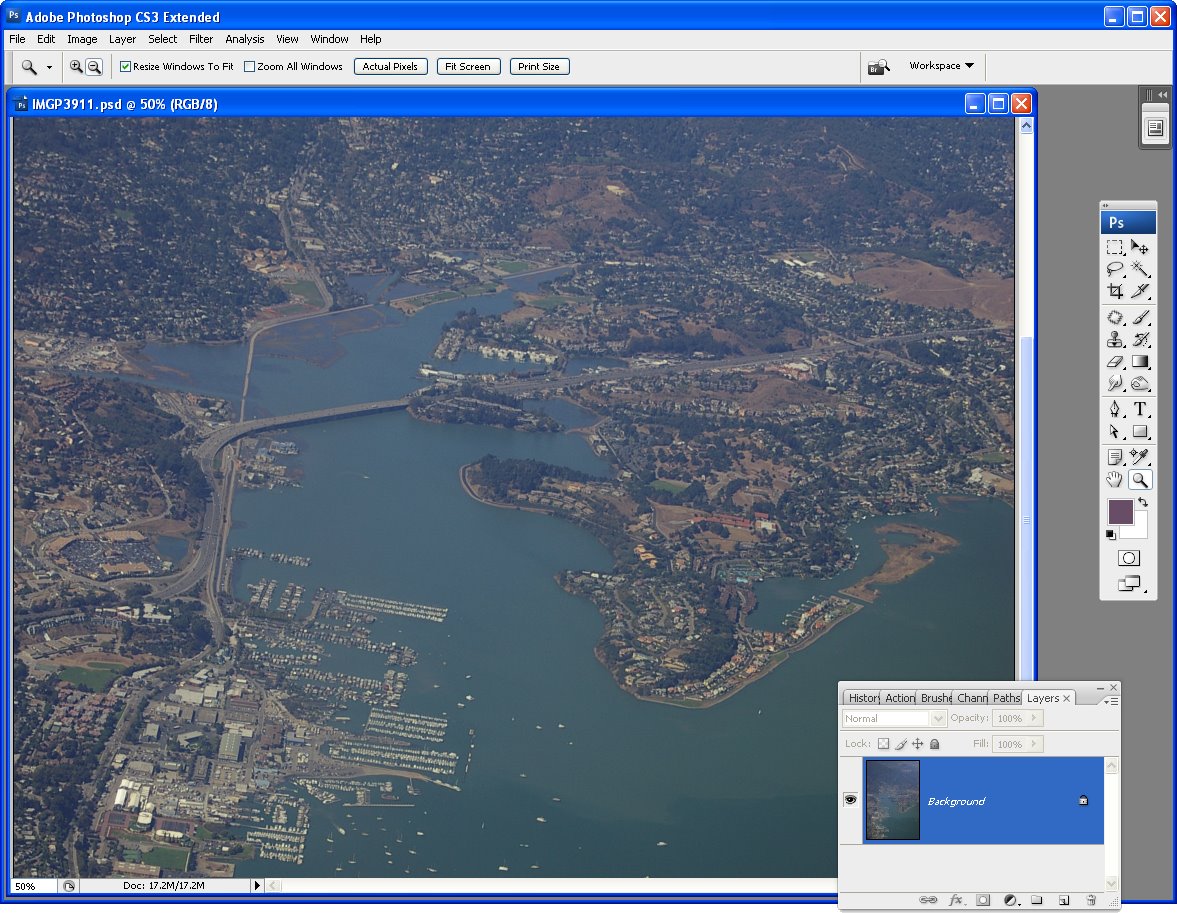
Step 2
Select the background layer and choose Layer > New Adjustment Layer > Levels and click Ok. The Levels histogram tells you a lot about the state of your image. In most cases you’ll lack white whites and black blacks and most of the image content will be around the middle of the image. Drag the right and left sliders below the chart so that there are below the points where the chart data begins. This should give the image an immediate boost in contrast and some boost in colour too. Adjust the midtone slider if desired to fix the midtones in the image and click Ok to confirm your settings. 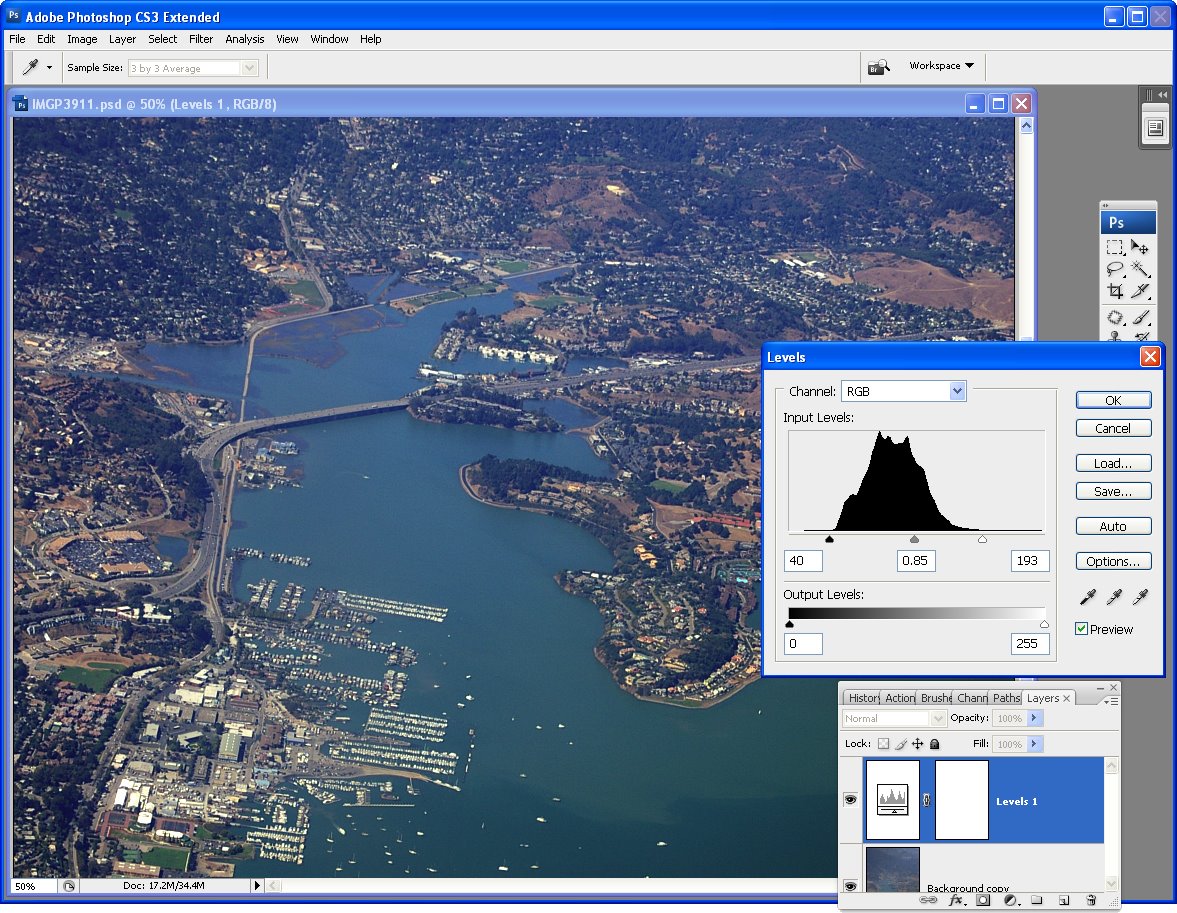
Step 3
Colour fixes: Often the image will contain too much blue and you can adjust this using a Curves adjustment. Choose Layer > New Adjustment Layer > Curves and click Ok to display the curves dialog. Click the Channel list and choose the Red channel. Drag up on the middle of the Red channel line to add some red to the image. Repeat with the Green channel adjusting it as required – drag down on the middle to remove green and up to add it. Finish with the Blue channel.
If you’re unsure which way to go with the adjustment, give the line a good pull in one direction or the other to see what happens, back off the adjustment to get something less intense. Different places on the curve line will give you different effects so experiment either side of the midline. Click Ok when you are done.
Step 4
Fixing uneven contrast: Photographs shot from high up are generally display better tonality in the areas closer to you and poor tonality in areas farther away. To fix this add another layer by choosing Layer > New Layer and click Ok. Fill this layer with a gradient by selecting the Gradient tool and select the Black to White gradient. Choose the Linear option and drag the gradient to fill the layer. You want black at the top of the layer and white at the bottom – if you get it wrong, drag in another direction till you get it right. Don't worry that your photo has disappeared in the process!
From the Blend modes dropdown list choose Color Burn. This will darken the image considerably particularly in the areas where the black colour appears. Adjust the layer Opacity in the layer palette until you get an acceptable result.
Step 5
Final touches: To finish the colour fixing, boost the saturation using Layer > New Adjustment Layer > Hue/Saturation and increase the Saturation a little. If the image needs a little lightening and if you're using Photoshop CS3 or CS4, use a Brightness/Contrast adjustment layer. If you're using Photoshop CS2 or earlier, use a Curves adjustment and this time drag the composite RGB curve upwards to lighten the image. The Brightness/Contrast tool in earlier versions of Photoshop is to be avoided at all costs as it damages good pixels in the image - the new tool that first appeared in Photoshop CS3 is much different and much better.
step 6
Sharpening: The final step is to apply some sharpening to the image. To do this, you need a single image layer so press Ctrl + Alt + Shift + E to create a composite layer. Select this layer and use Filter > Sharpen > Unsharp Mask to sharpen the image. Set the Radius to between 0.5 and 1 and set the threshold to under 10. Adjust the Amount until you get a good sharpening of the image. 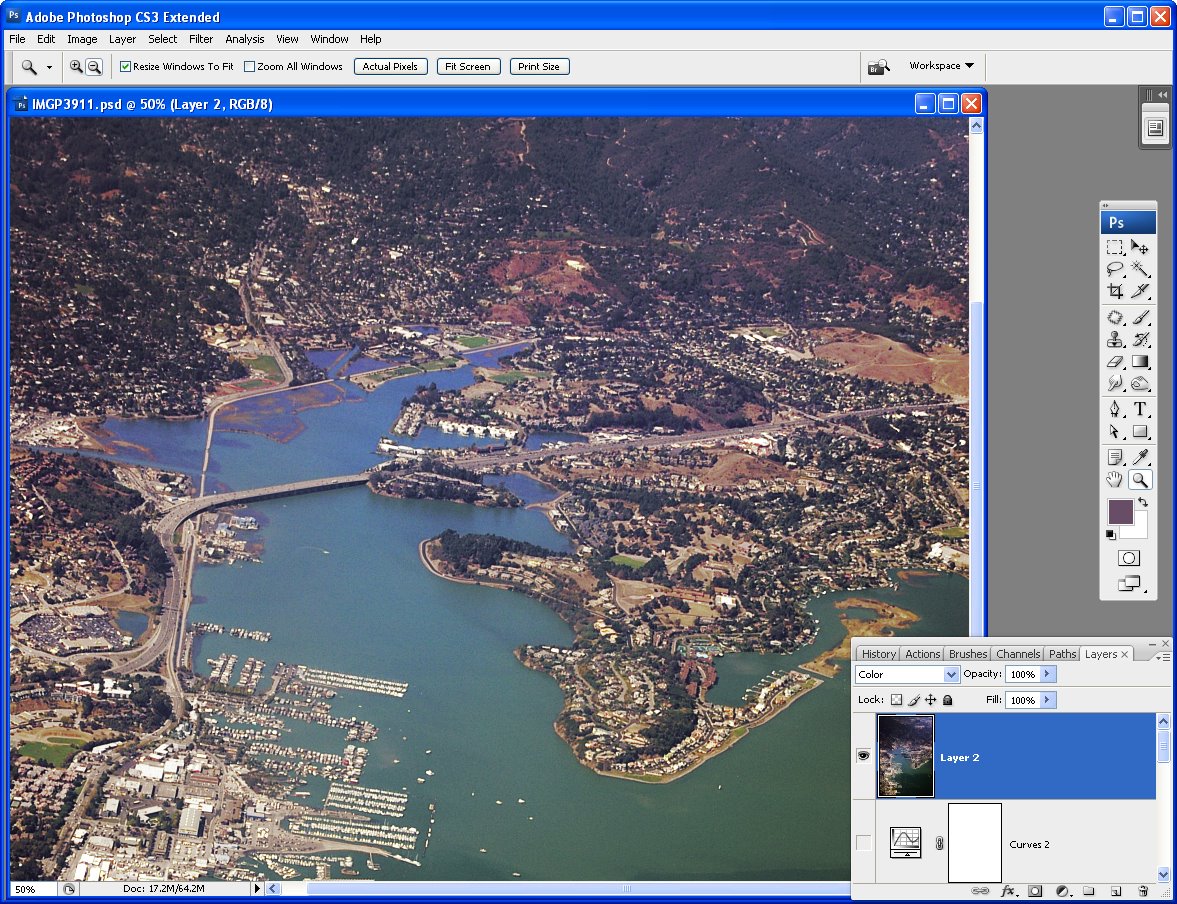
Labels: airplane window photos, Brightness/Contrast, curves, Photoshop, Sharpening
posted by Jane @ 10:54 AM
![]()
![]()

8 Comments:
Helen, I could kiss you! I have scoured the internet looking for exactly this type of fix. I can't wait to try your instructions. MUAH!!
Will Helen explain how to correct the color variance of purple in vegetation on horizon. How about too much yellow in for ground?
Nice instructions. Pretty much all of this can be done non-destructively to your original RAW or JPG images using Adobe Lightroom 2 - I'm going to try it out when I get home today.
Incidentally, your 'before' and 'after' images are cropped differently, not that it's really critical in this situation, but I thought I'd point it out.
Awesome!
I just took some pictures of Montreal two days ago. Thank you :)
Very good tips and well instructed.
Thanks.
very valuable, thanks for sharing
Great tips for fixing plane photos. I recently flew into Toronto from Florida and got a nice sequence of shots.
I shot them in RAW on my DSLR and besides the adjustments you've mentioned I was able to fix-up the images with Photoshop's cameraRAW plug-in changing things like:
White Balance
Exposure
Saturation
Vignetting
Contrast using Curves
I found the best way to use CameraRAW was with the bridge. I left things like sharpening and any further adjustments for photoshop to handle.
If you're interested in seeing the images you can see them here:
http://www.flickr.com/photos/gord-davis/sets/72157613125144608/
Thanks! That's very helpful!
Post a Comment
Subscribe to Post Comments [Atom]
<< Home