Articles | Photography Blog | Office Tips Blog | about me | e-mail

Helen Bradley - Photoshop and Lightroom tips and techniques

Saturday, March 14, 2009

Stupid Photoshop tricks #1 - hold your own photo
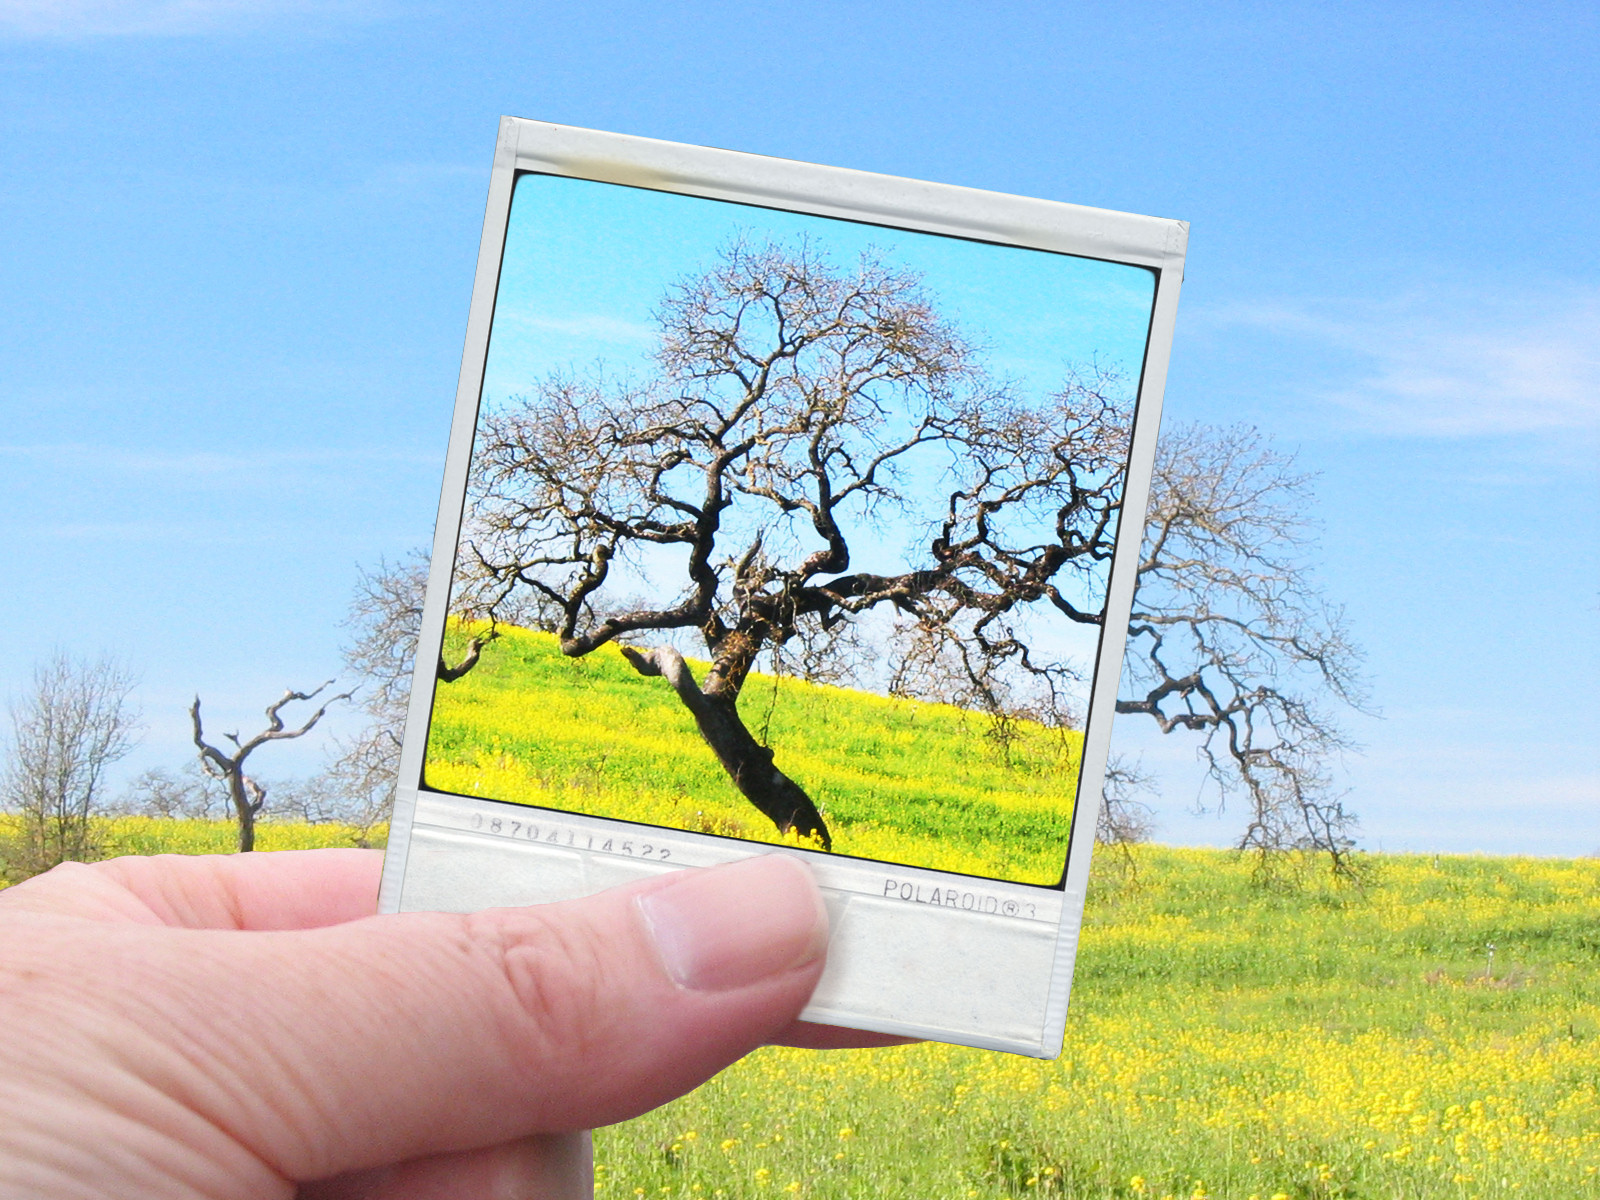


There are heaps of creative things you can do with your images in Photoshop and one I think totally rocks is a collage technique that turns your photo into a photo of itself. If you're totally confused, check out the image - you'll see a hand holding up what appears to be a Polaroid image in front of a scene – the Polaroid image itself shows part of the background scene and it's all done in Photoshop - here's how:
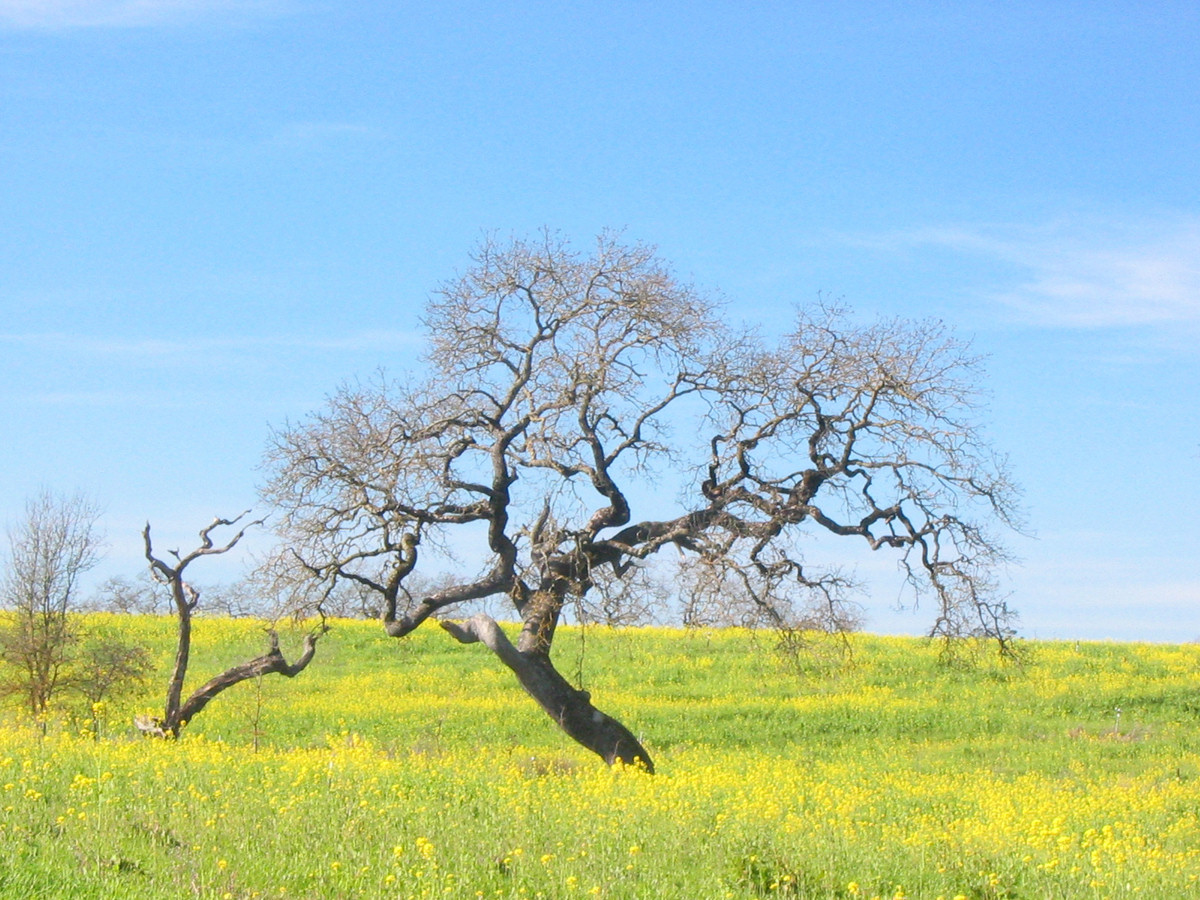

To create this image you will need a photo with an interesting subject. I've used a spring landscape.
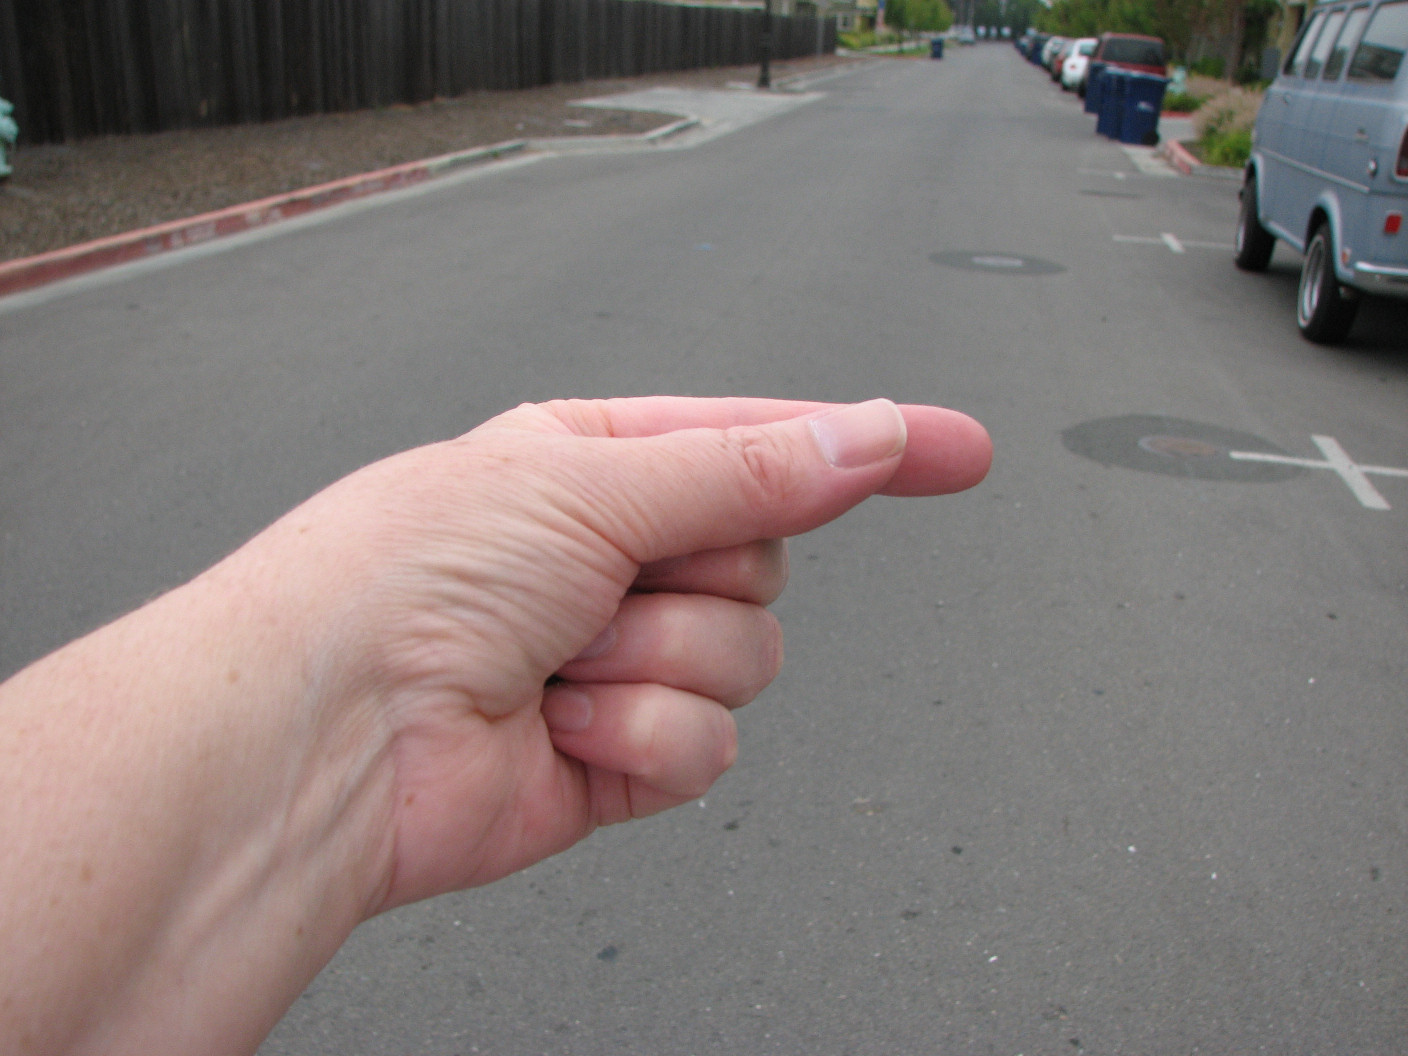

You will also need a photo of your hand held as if you are holding a photo in it. Take the photo of your hand with your point and shoot camera held in one hand and your other hand stretched out in front of you. You may need to use macro mode to ensure that the hand is in focus and not the scene behind. The ideal setup for photographing your hand is with a road or carpark as the background – the contrast between your skin and the road will make it easy to select around your hand.

While you can create your own faux Polaroid image, there is a good one you can download from http://lured2stock.deviantart.com/art/Polaroid-3262470.

Open the photo of your hand, the landscape and the Polaroid image in Photoshop. Crop the hand to remove excess background.

Select around the edge of the Polaroid image and remove its excess background so you have only the image itself.

Drag the background layer from the Polaroid image and the hand image into the landscape image. Each element will appear on its own layer.
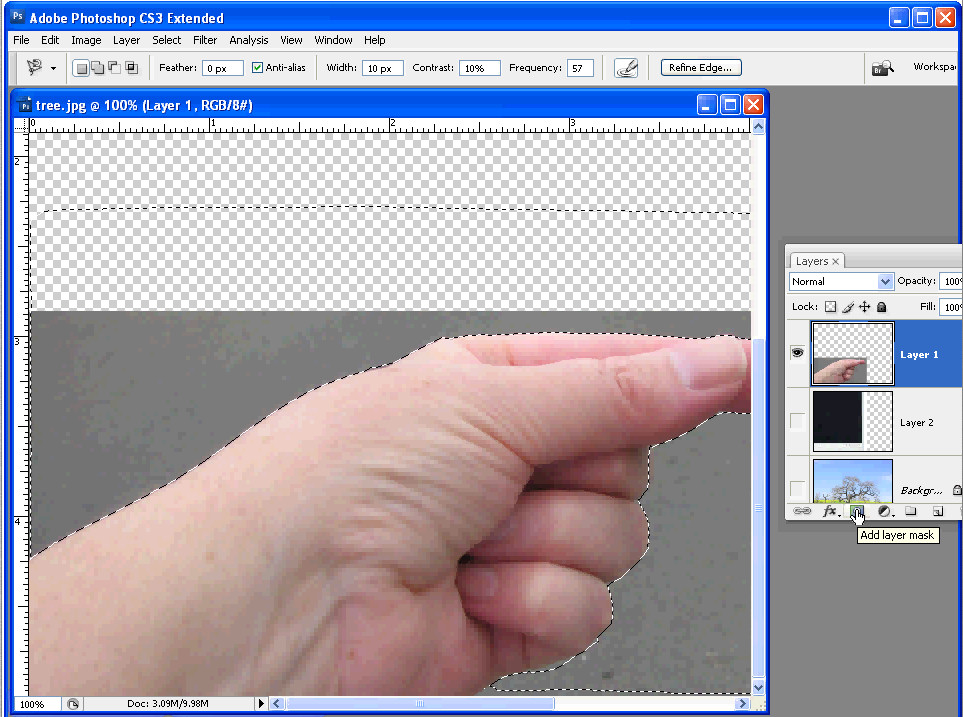

Drag the hand to the top of the layer stack and hide the other two layers. Use your favourite section tool to select around the hand and add a layer mask by clicking the Add Layer Mask icon at the foot of the Layer palette (use Alt + Add Layer Mask if you selected the background rather than the hand). Using a layer mask makes it easier later on to remove parts of the hand so the Polaroid will look like it is held in your hand.
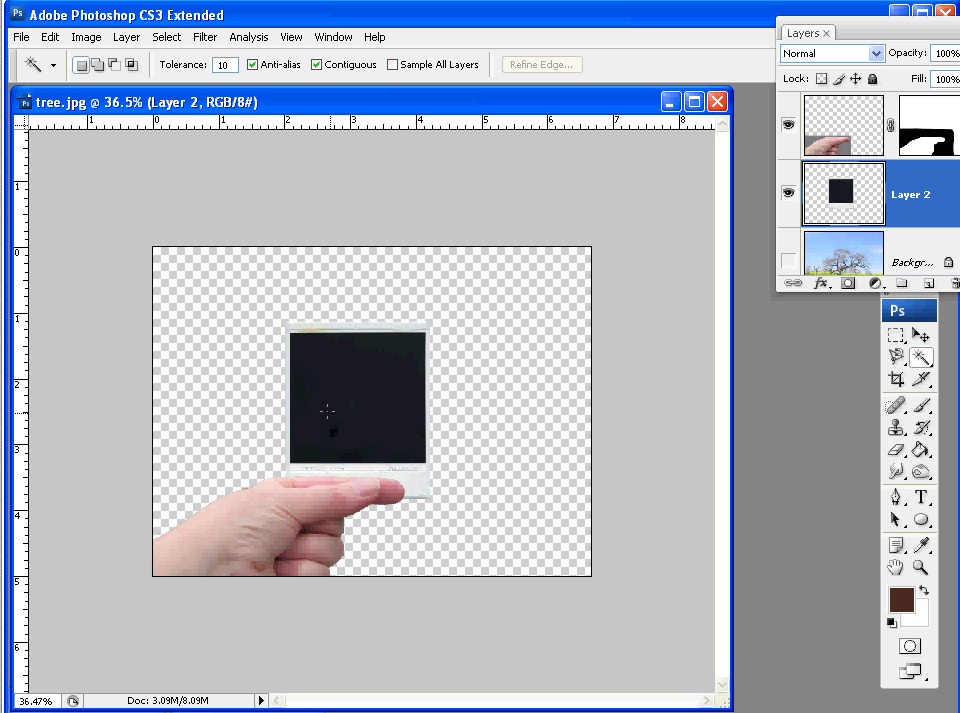

To transform the Polaroid image so it is the correct size, Ctrl + click on its layer thumbnail and select the Move tool. Press Ctrl + T to select the free transform tool and then Ctrl + 0 (zero), to scale the image so that you can see its sizing handles. Drag the Polaroid into the approximate position it should appear in the image and size it to suit. It should appear partially covered by the hand.
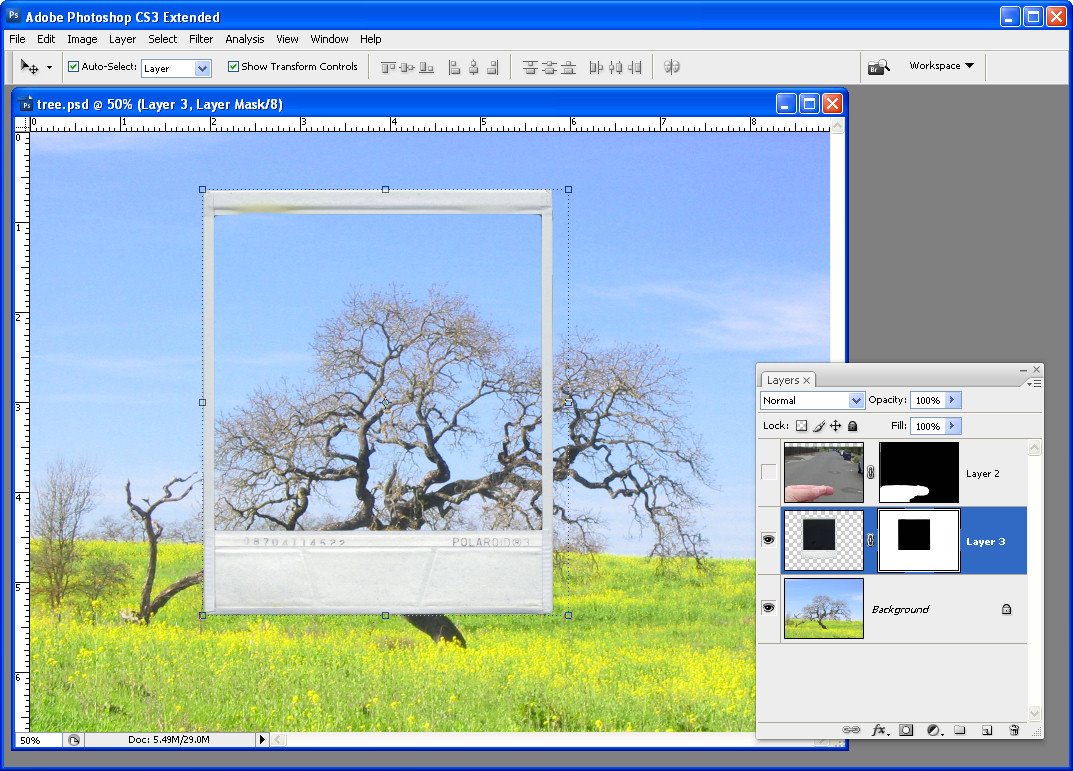


Make a selection around the inside of the Polaroid image and delete it or add a mask to hide it. Select the background layer and hide the two top layers. Move the selection over the underlying image – choose Select > Transform Selection and resize it in proportion if desired.
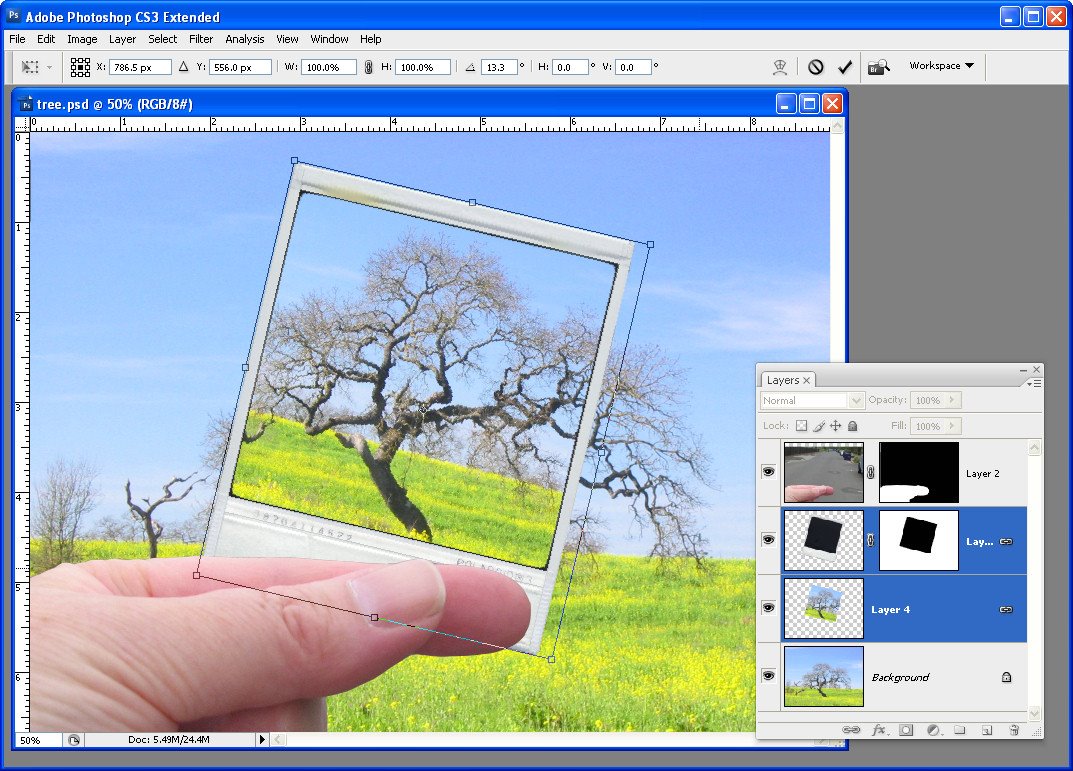


Choose Edit > Copy to copy the selection onto the clipboard, then Edit > Paste to paste it into a new layer, size it to fit the hole in the layer above. Brighten this layer if desired. Select this layer and the Polaroid image by Shift + clicking on each of them and choose Layer > Link Layers. Rotate the Polaroid slightly.
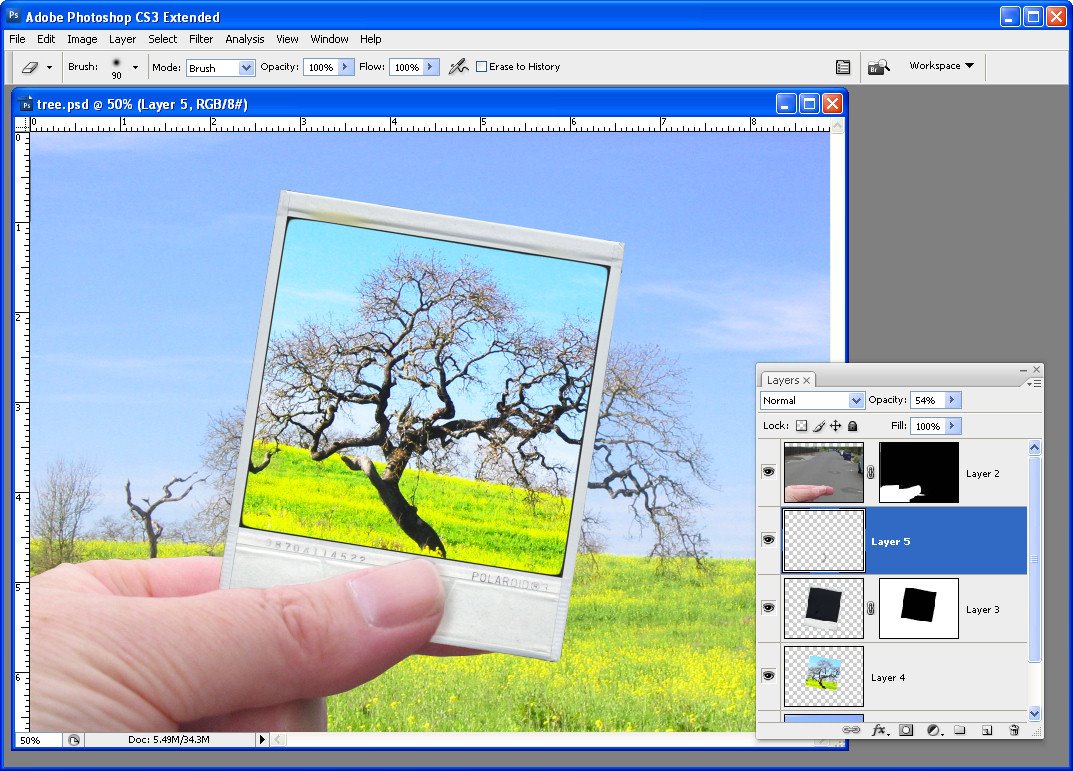


Make the hand layer visible again. Select the brush and black paint, click on the layer mask for the hand layer and paint out portions of the hand that should be behind the Polaroid. Add a new layer below this layer and paint a small drop shadow along the edge of the fingers over the Polaroid.

Labels: , , , ,

Monday, November 19, 2007

Paste to a layer mask

Ok, here's the dilemna. You have two images open in Photoshop and you want to add one image as a layer mask into the other.

One solution is to copy the first image, then switch to the second. Click the layer mask and switch to the Channels palette. The layer mask appears as a channel. Select the channel's visibility icon to make it visible, select the channel to make it active, and click Edit, Paste. Deselect its visiblity, reselect the RGB channel to make that one active, switch back to your Layers palette and the pasted selection is in your layer mask. This solution has the advantage that the copied/pasted piece doesn't have to be the same size as the layer mask.

The alternate solution if the two images are the same size, is to use Apply Image. Select the target layer mask, choose Image, Apply Image and, as the Source, select the image to copy from, the layer to copy and click Ok. Now the selected layer (or the merged source) is pasted into the Layer Mask.

Two alternatives, the second is easier to use but it does require two same size images.

Labels: , ,

Friday, November 09, 2007

Rooftops in the rain - Brighton


When I was in Brighton we had one beautiful summer like Sunday when everyone was walking along the beach and it was all so gorgeous and then, next day, it rained cats and dogs.

Here's a photo I took from my hotel room window across the roofs of Brighton the day it rained. I don't think the windows of the Queens Hotel had been washed since good ol' Queen Vic gave her name to the hotel so they were pretty interesting to shoot through and, of course, they only opened 6in from the bottom so shooting through the gap was impossible.

The original was flat and lifeless as one might expect. A Levels adjustment is a great starting point for a photo like this. Simply choose Layers, New Adjustment Layer and then choose Levels. Drag the little triangle sliders in from the left and the right till they are just under the places where the chart data begins and ends. This darkens the darks and lightens the lights and instantly boosts the tonal range in the image and gives it more contrast and life. The middle slider handles the midtones so you can drag it to the right or left as required for your image.

For the rest of this image I worked hard to get the colour and detail back. The cream buildings in the background were treated independently of everything else as they just kept getting lost in every solution I tried. Masks are great for this, fix one part of the image with adjustment layers, then hide the adjustment layer and work with another one focusing on the other part of the image. Then, use the mask on each adjustment layer to paint in or remove the fix from areas of the image. When I want most of the fix I just paint in black over the areas that I don't want the fix to be applied to. When I only want little bits affected by the mask, I fill the mask with black (white reveals, black conceals), then paint with a low opacity, soft white brush to bring back the fix in the small areas that it is needed.

I also used the Selected Color adjustment on this image, I'll talk more about it in a future blog post.

Labels: , , , ,

Wednesday, November 07, 2007

Photoshp CS3: Copy a Layer Mask

Often you'll need to copy a layer mask from one layer to another so you can mask out the same area on two layers. I do this when I mask the hightlights highlights in an image to protect them from being blown out.

Copying a layer mask doesn't look easy or intuitive - there's no menu command for it. However it can be done very simply. Hold the Alt and Control keys at the same time and drag the layer mask from one layer and drop it onto another. If there is already a layer mask on that second layer you'll be prompted to replace it, answer Yes to the prompt.

Labels: ,