An Adjustable Black and White Conversion
Most photo editing programs offer multiple ways to convert to black and white and Photoshop Elements is no exception. In fact it has a great Black and White conversion tool which is marred by the very small preview images you get to work with. Additionally, there is no zoom feature so you're stuck with seeing your image in miniature (see image), or you find another way to make the conversion. 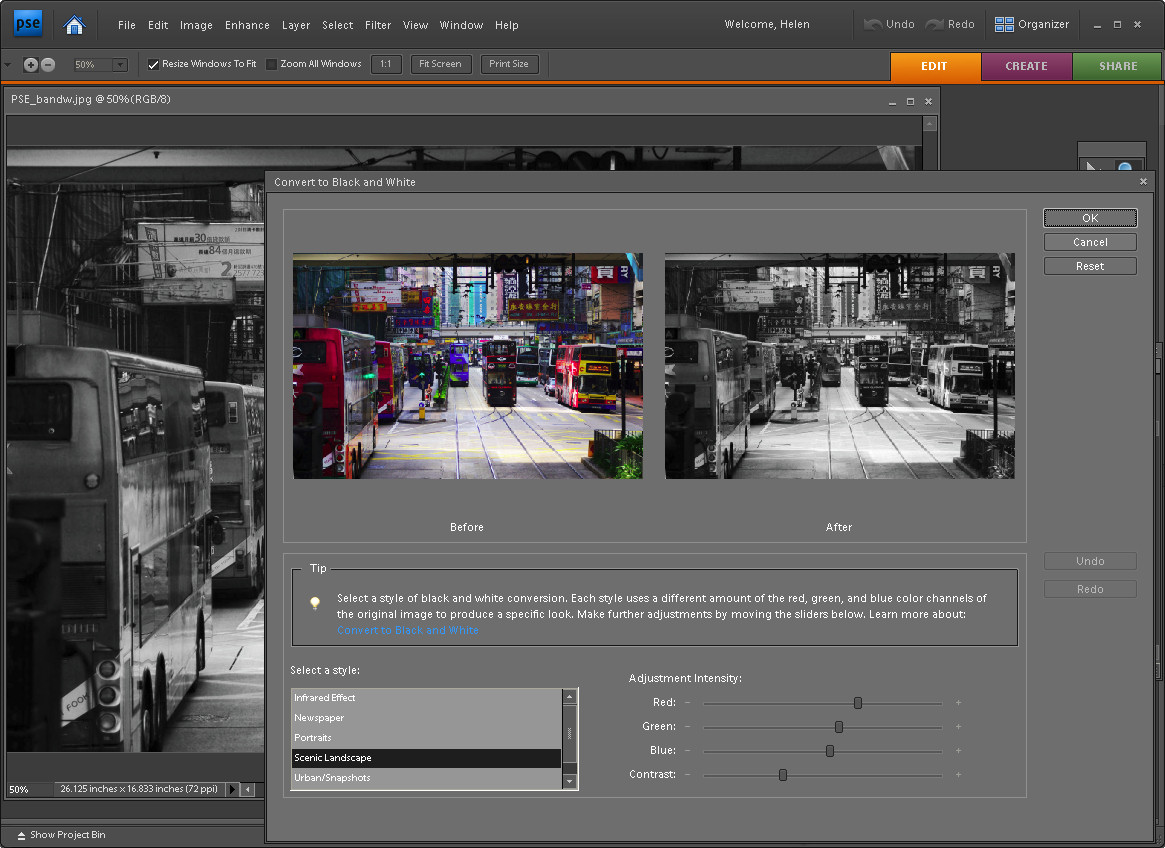
Here's an alternative method of converting to black and white in Photoshop Elements which lets you work on the image at any size so you can see what you're doing. It also works in Photoshop: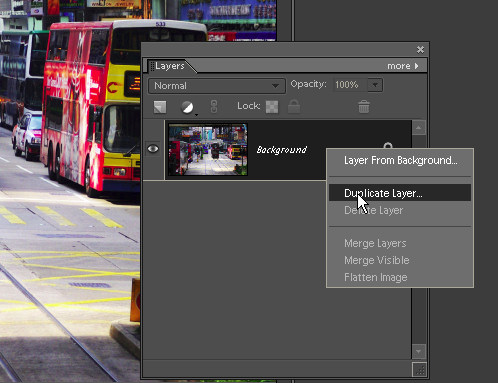
Step 1
Open your image Photoshop Elements and duplicate the background layer. Do this by first displaying the Layers palette by choosing Window > Layers, right-click the Background layer and choose Duplicate Layer.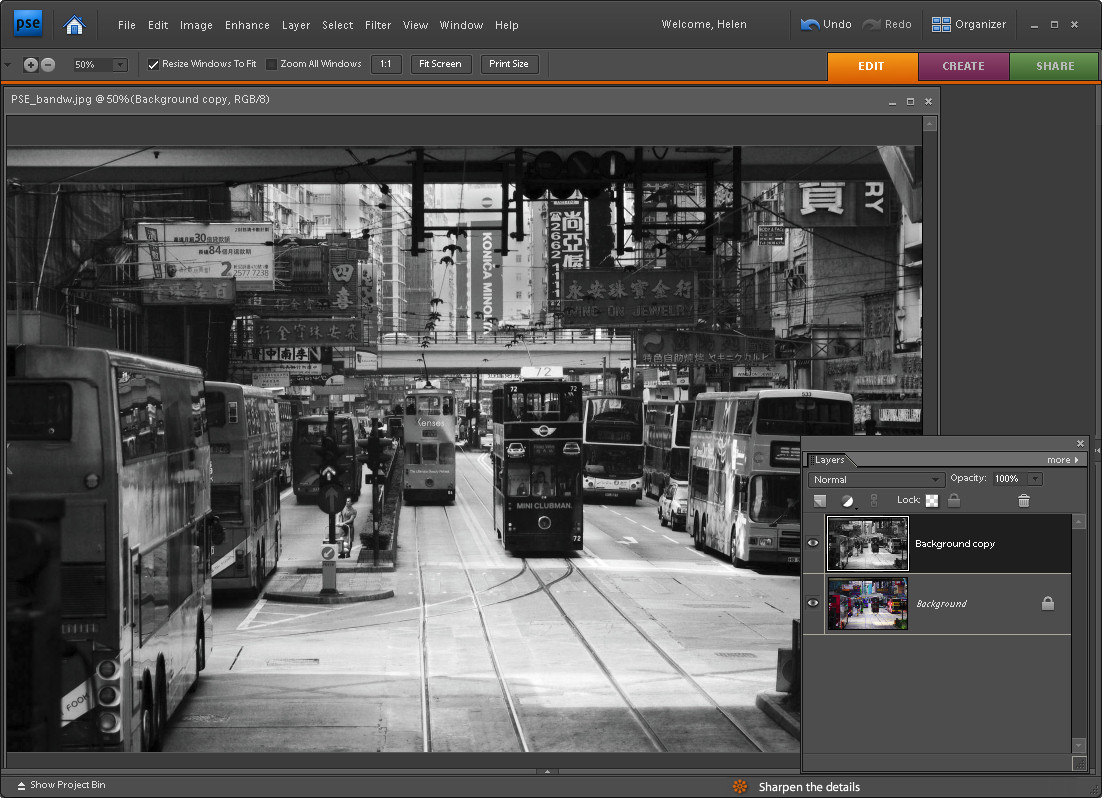
Step 2
Select the topmost layer and choose Enhance > Adjust Color > Remove Color. This converts the image to a black and white image.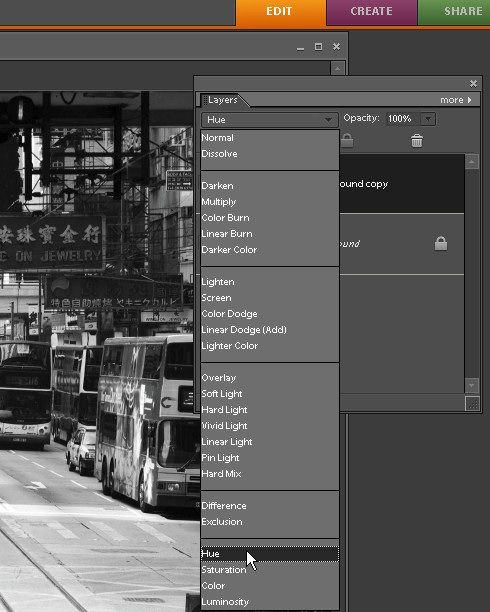
Step 3
From the Blend mode dropdown list in the Layer palette, select the Hue blend mode. This ensures the top layer's hue (color) shows but uses the layers below to provide the lightness and saturation for the image. We can now adjust the bottom layer to change the black and white image.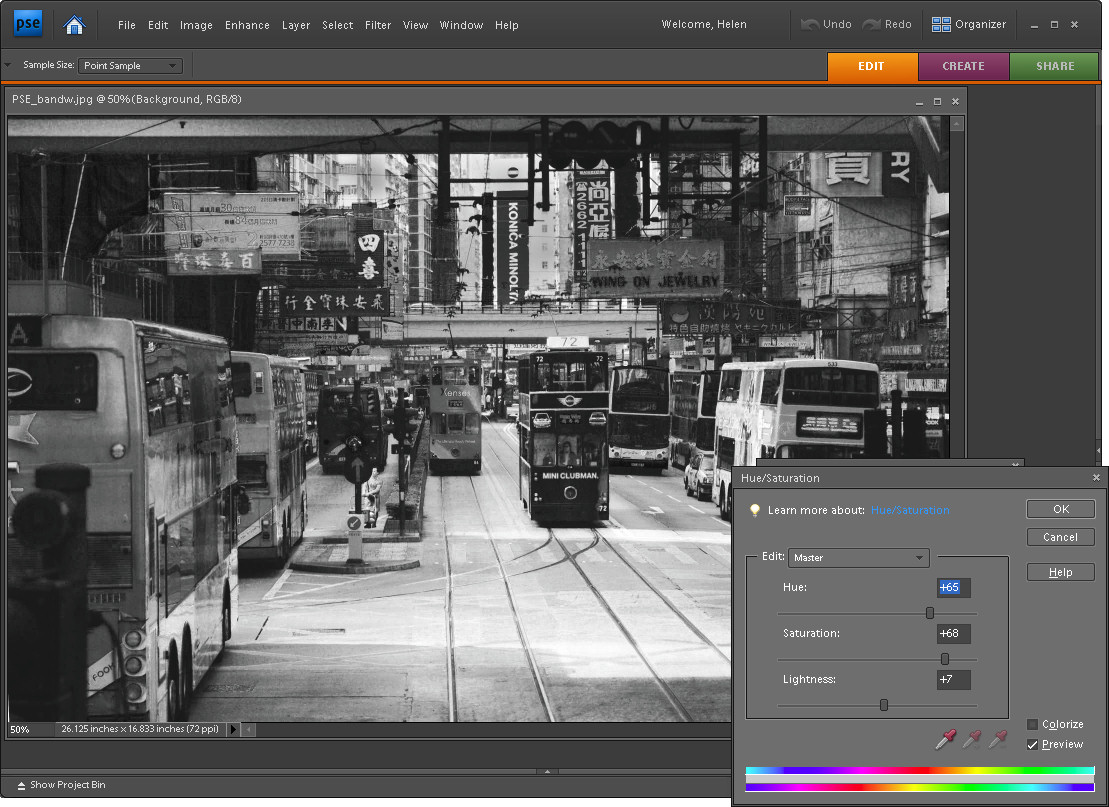
Step 4
Select the bottommost layer in the image and select Enhance > Adjust Color > Adjust Hue/Saturation. This opens the Hue/Saturation/Lightness dialog. You can now select any of the sliders and drag them in either direction and you'll see as you do so that the black and white image changes.
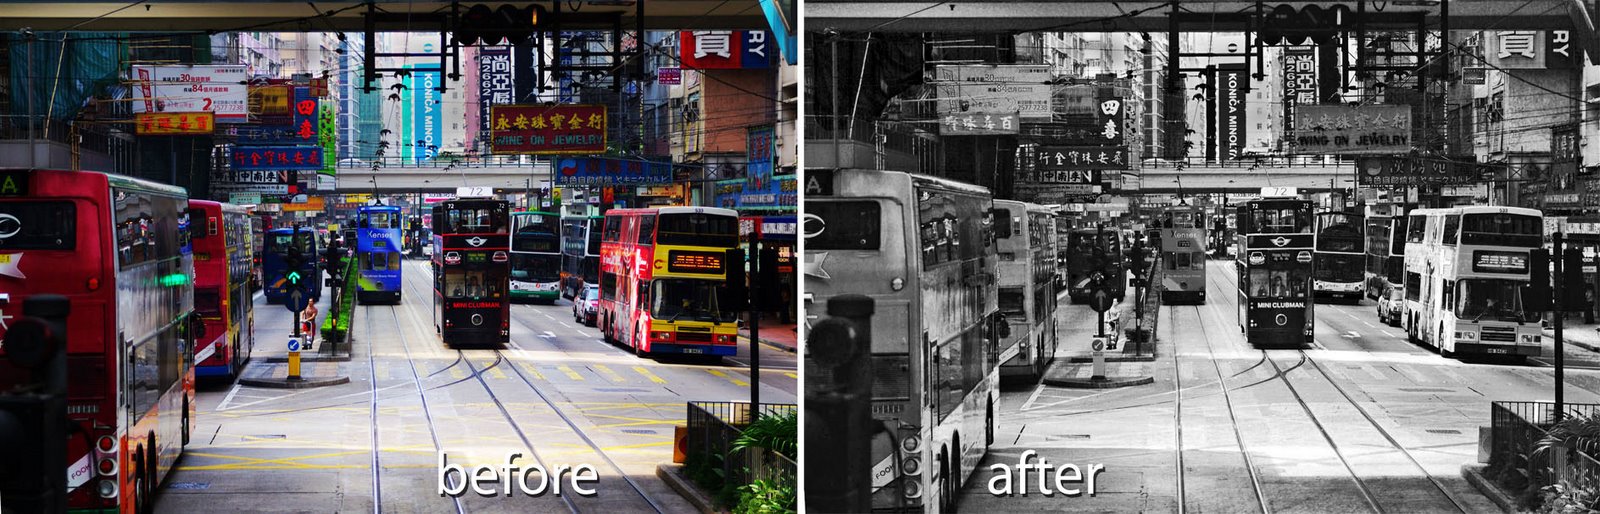
For example, adjusting Lightness will adjust the lightness and darkness of the image itself. Adjusting Saturation will also make the image darker or lighter. Use the Hue slider to change the colors in the underlying image with the result that different colors will tend towards being light and others tend towards being dark. For example, in this image, changing the Hue made a significant difference on some of the signs over the street – at one position the text was all the same shade of gray and in another position the text was lighter against a dark sign. Pick a slider position that works best for your particular image.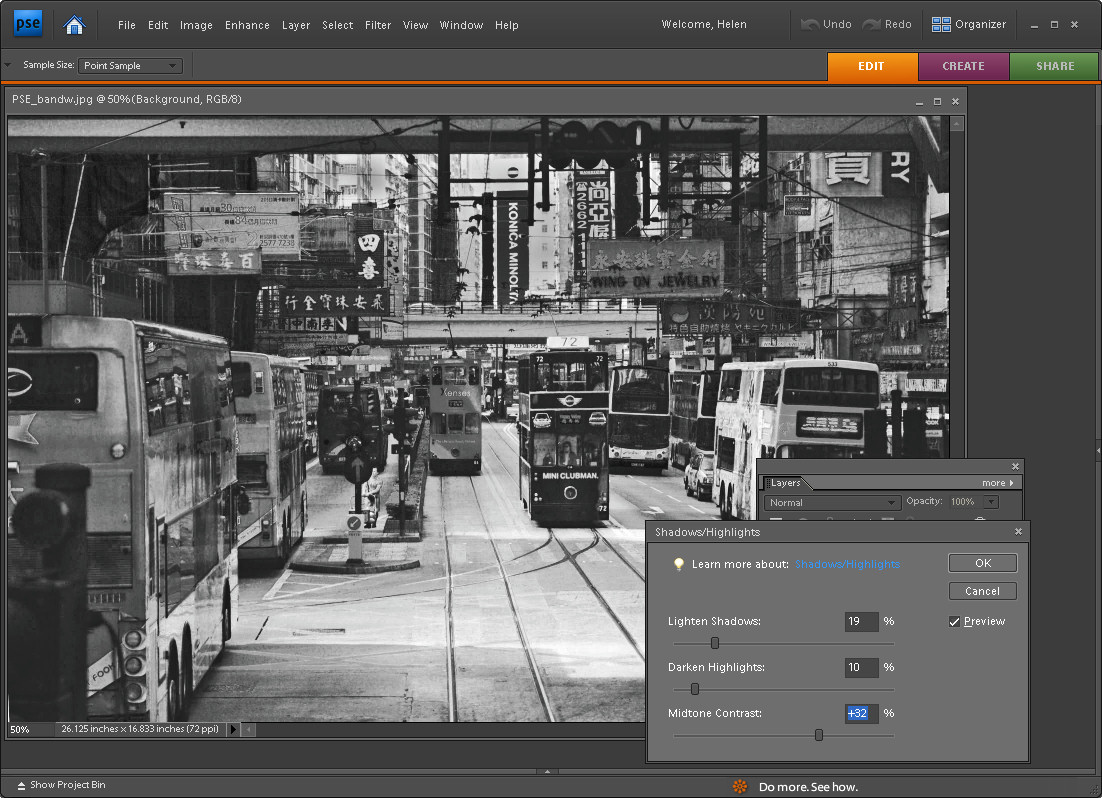
Step 5
To adjust the contrast in the image, with the bottom layer still selected, choose Enhance > Adjust Lighting > Shadows and Highlights. Drag on the sliders to adjust the tonal range in the image. You can darken the lighter areas, lighten the shadows and add some contrast to the midtones this way. With the preview option enabled, you will see the results at full size on the image as you work. You can also do the same with the Levels adjustment – again apply it to the bottom layer of the image.
When you are done, flatten the image by selecting Layer > Flatten Image.
This process allows you to convert an image to black and white while previewing the results at full screen size while you work and with quite a bit of creative control. I find it gives me a better appreciation of what my image will look like than using the very small dialog previews in the specialist black and white conversion tool.
posted by Jane @ 2:05 PM
![]()
![]()

8 Comments:
Oooookay: Lifehacker said this was for Photoshop, and the article says it'll work in Photoshop, but Helen loses me in step 2; --Photoshop CS4 doesn't have the Enhance => Adjust Color => Remove Color commands...???
I found a similar tutorial for Photoshop here:
http://www.photoshopsupport.com/tutorials/or/selective-coloring.html
works great, nice technique.
This is very useful, even though I have an early version of PE. Thank you for your clear instructions!
Waw Great Black and White..
In full Photoshop you can just use Desaturate. Image > Adjustments > Desaturate.
It's Ctrl-Shift-U or Cmd-Shift-U.
How do you feel about Picasa B&W conversions?
Excellent Helen, thanks very much. Fantastic little tutorial.
Hmmm, Causeway Bay, Hong Kong!
Post a Comment
Subscribe to Post Comments [Atom]
<< Home