Articles | Photography Blog | Office Tips Blog | about me | e-mail

Helen Bradley - Photoshop and Lightroom tips and techniques

Sunday, May 20, 2007

Photoshop - Replace a sky


It seems to be one of those things that people are least satisfied with - the sky in their photos. It's all too easy to shoot a wonderful image on a sunny day, there's not a cloud in the sky and it's blue, blue, blue. However, when you return home the sky in the photo you took is dingy blue white - yuck, yuck, yuck. It's disappointing and it doesn't have to happen.

If you're shooting with a digital SLR invest in a polarizing lens and use it! It will make your skies deliciously blue. You can also get these lenses for many point and shoot cameras, I have an adapter and a polarizer on my Canon 3S IS and it all just snaps into place.

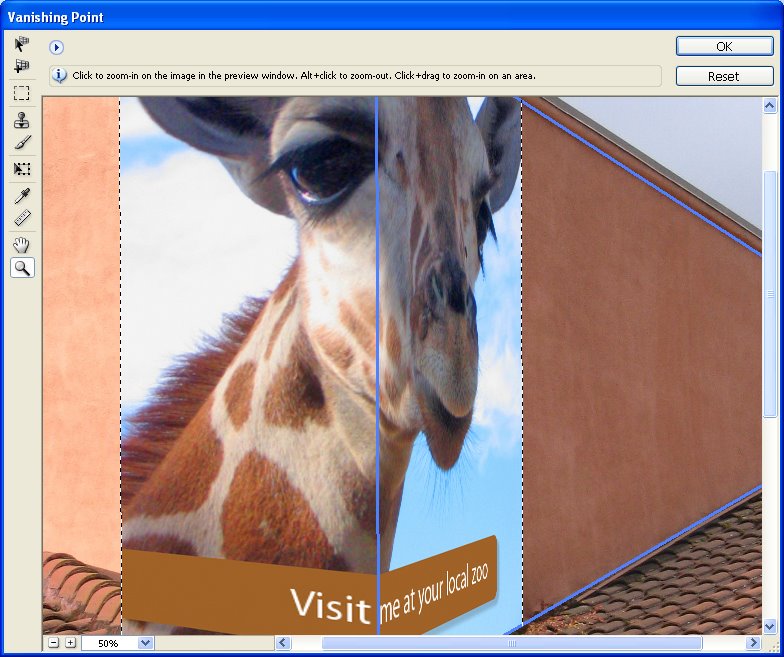
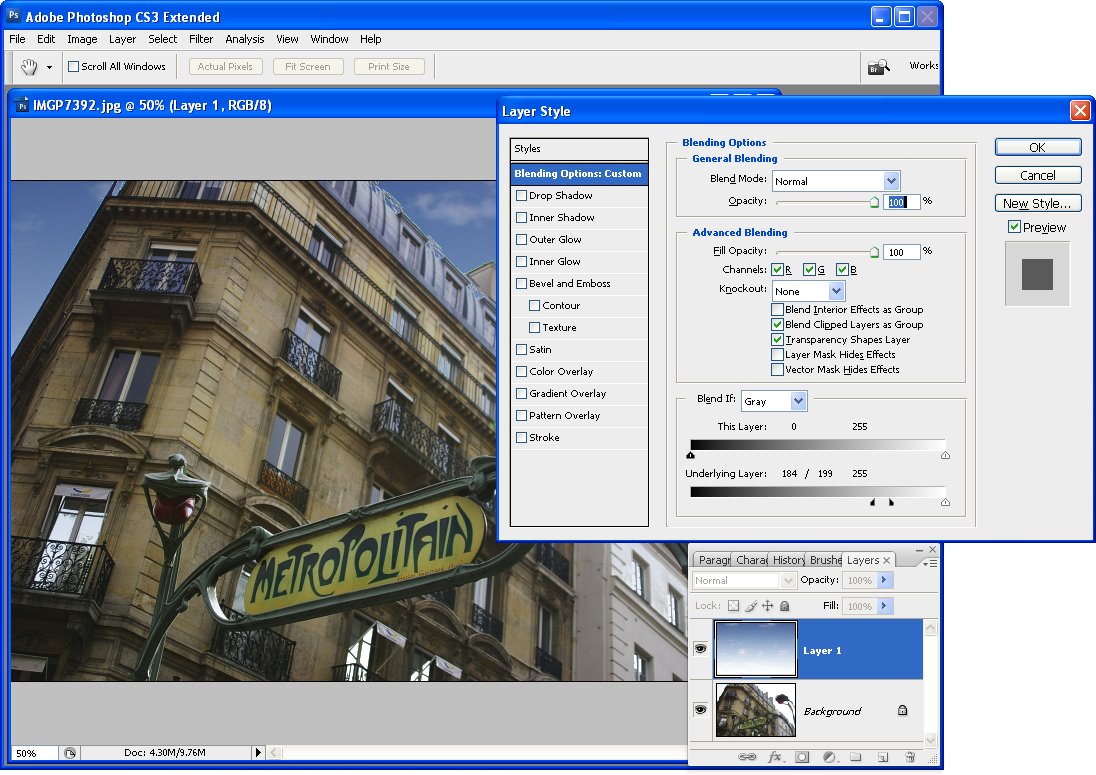
If all else fails, take a series if good photos of just sky when it's not so bright and keep these in a "spare skies" folder. Then, when your sky isn't all you want it to be, like my old car, you simply search out a spare part - replacement sky for it. To use it, visit my new Photoshop skies tutorial - don't be fooled by the title, it's a great step by step solution and there are links to some of my Youtube videos on replacing skies too, at the foot of the page.

Labels: , ,

Tuesday, May 15, 2007

Vanishing Point in Photoshop CS3


The Vanishing Point Filter in Photoshop lets you create perspective grids that you can drop an image into.

To do this, copy the image to paste into the grid into the clipboard and open or create the image to put it into. Add a new layer to this image, select it and choose Filter, Vanishing Point Filter.

Click the Create Plane Tool and click on the four corners of the grid. Move the points if necessary, you need a blue grid (if it's yellow or red it isn't correct and won't work). Now, you can drag a second related plane by holding the Control key (Command on the Mac) and drag from a side to create a second pane. Don't worry about the direction just that it's at right angles to the existing pane. Let go the mouse. Hold the Alt key (Option on the Mac) and drag to align the pane, fine tune using the Angle value.

Now either continue to create planes or paste the image using Control + V (Command + V on the Mac). Select the Marquee tool and move it into position on the grid. Use the Transform tool to size it if desired. When you're done, click Ok.

If you need to remove or delete the plane - for example to start over, click on it so it's selected and press Backspace.

The Vanishing Point Filter is heaps of fun - use it to apply an image to a building, the side of a truck, or just in thin air!

Labels: ,